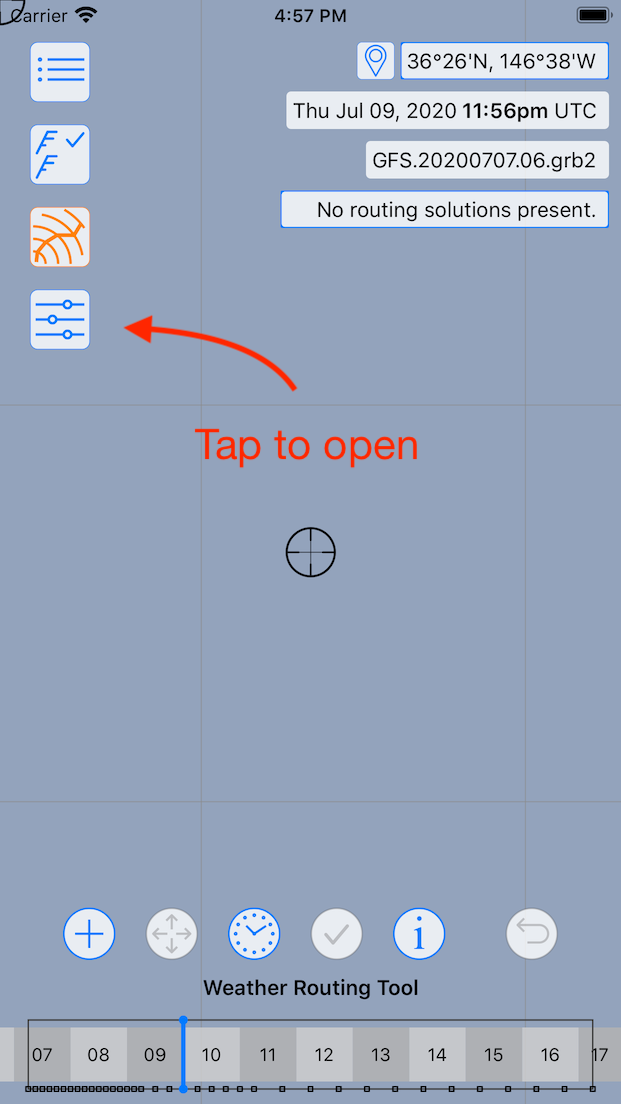
To start working with the weather routing system you need to select the weather routing tool. This is done by tapping on the button on the left, below the draw settings icon:
After tapping the Weather Routing tool button, the WR tool is made active and a Weather Routing pane is made available. If the device is large enough, the pane will be opened automatically, otherwise it can be opened by tapping the WR settings button:
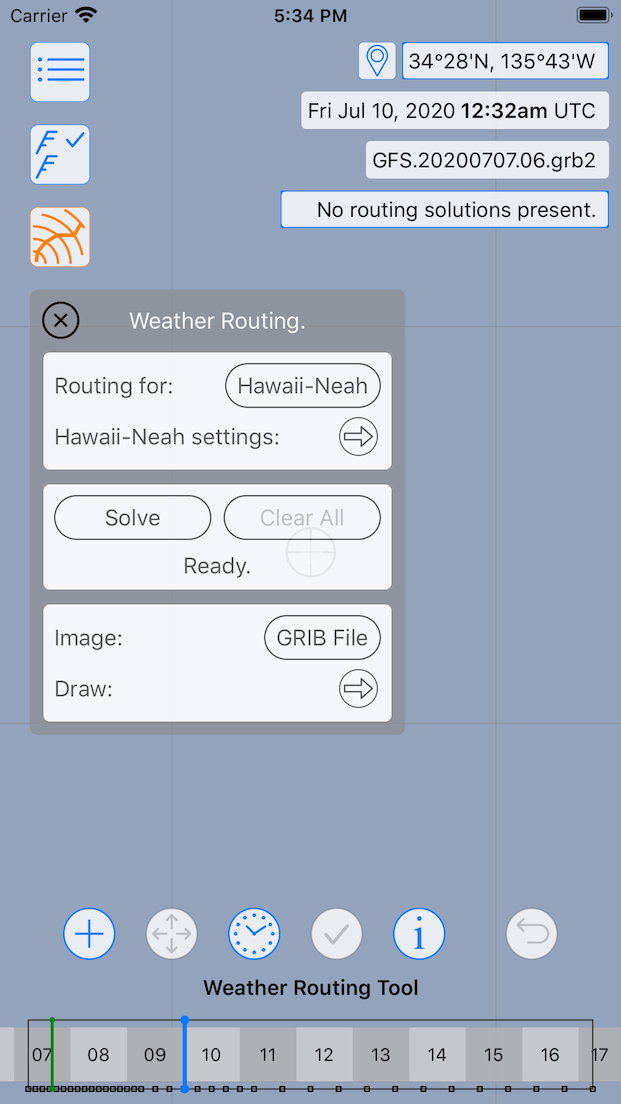
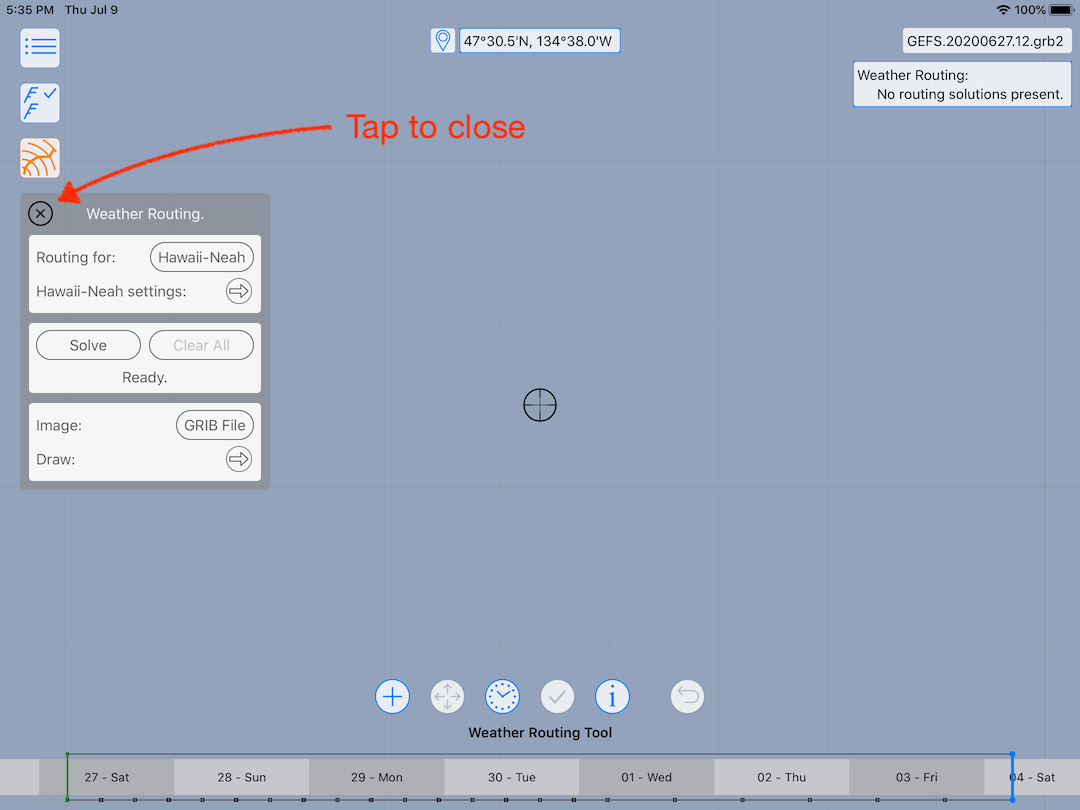 Weather Routing mode on an iPad
To exit the tool, tap the WR tool button again.
Most of the weather routing configuration is done in two areas: the configuration area in the weather routing pane and through the tool menus. This page describes the weather routing pane:
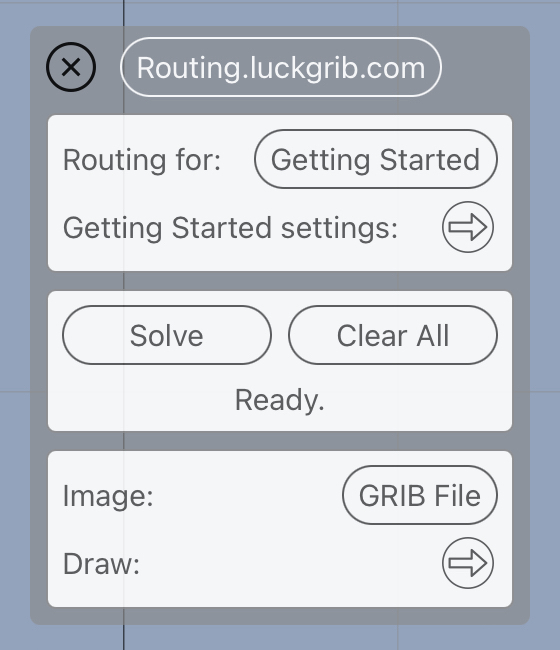
Download this site!
Note that the routing.luckgrib.com title is actually a button. The first time you tap that button, a dialogue will appear offering to download this site. If you do that, then you can then tap the button at any time, even offshore while away from wi-fi, and continue reading.
As an added bonus, you can also search through the site content when it is being read locally.
Routing for:
The system creates weather routing solutions for vessels, and multiple vessels can be created in the system. The menu associated with the Routing for: button allows you to choose which vessel you are working with:
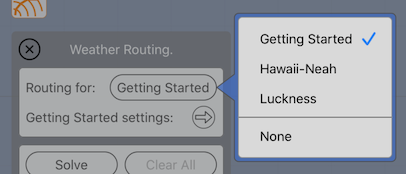
You can change the vessel at any time. Any previously created weather routing solutions for a vessel will remain when you switch vessels. This allows you to solve for one vessel, switch to a new vessel and solve again. After solving for two, or more, vessels the generated paths can be compared to each other.
If a vessel has had its visibility toggled off, it will not appear in this menu.
Vessel settings:
The second line changes its name according to the vessel that has been selected. Clicking on the reveal button to the right of this label opens the vessel settings editor. This is the editor which allows you to edit all of the settings associated with a vessel.
Example vessel settings are: starting point, vessel performance, tack/jibe penalty and many more.
Solve.
Clicking on the Solve button runs the weather routing solver. If this button is enabled, the system has enough input for the solver to run. If this button is not enabled, there should be a message displayed with a hint as to what is missing.
Clear all.
While the solver is running, the Clear all button will be named Halt. Tapping the Halt button will stop the solver and present any partially completed results.
When the solver isn’t running, the button is named Clear all and tapping it will remove all weather routing solutions.
Solver message.
The message shown below the Solve button will change from time to time, according to what the system deems important.
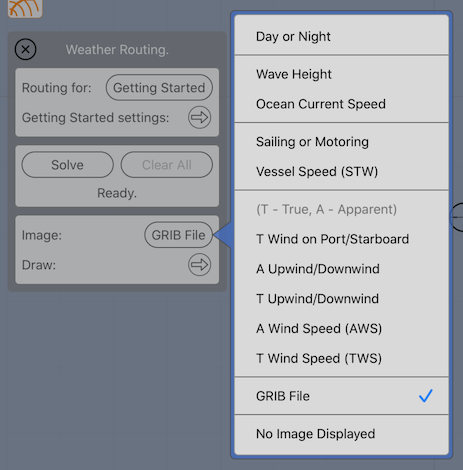
Image:
The menu to the right of the Image label allows you to choose one of the analysis image types. See the Evaluating results section for more details.
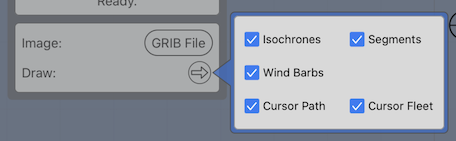
Draw:
The check buttons to the right of the Draw label turn on and off various elements that can be drawn.
Showing and hiding information
The system is able to present you with a lot of information describing the weather data and the Weather Routing solution. There are times when you want to concentrate on the display, and other times when you want to read the numbers and dive into the finer details. You have control over what information to hide and show.
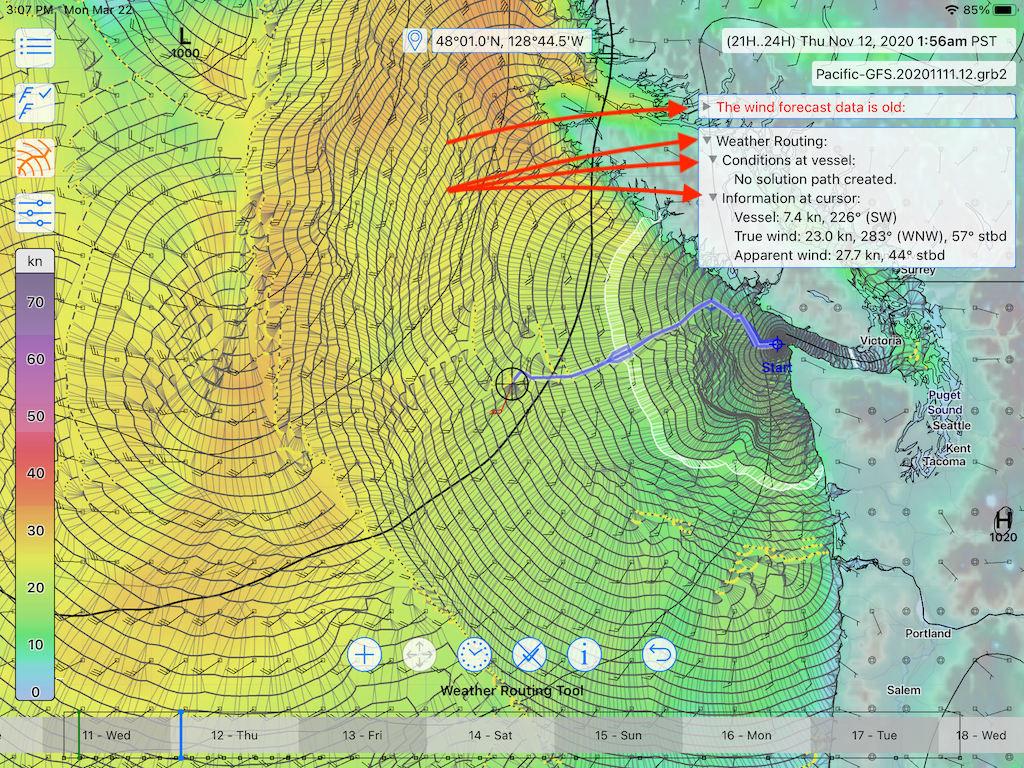
The two top right information text views contain little hide / show buttons in the shape of a little triangle, which points down or to the right. If you tap on these arrows, the group of information they control will be hidden or shown.
Note that while the arrows appear to be quite small, they have larger borders which you do not see. Tapping on them will be easier than it would appear.