As you start working with the weather routing solver, you may find that it is generating paths in areas that you know you do not want to sail into. Or it may be generating a path in some direction, and you have a preference to avoid that area and go a different way.
The solver supports boundary lines. Boundary lines are lines you provide, that the solver will not cross. Boundary lines can be used in a variety of ways.
Avoiding unsafe waters. Example outline.
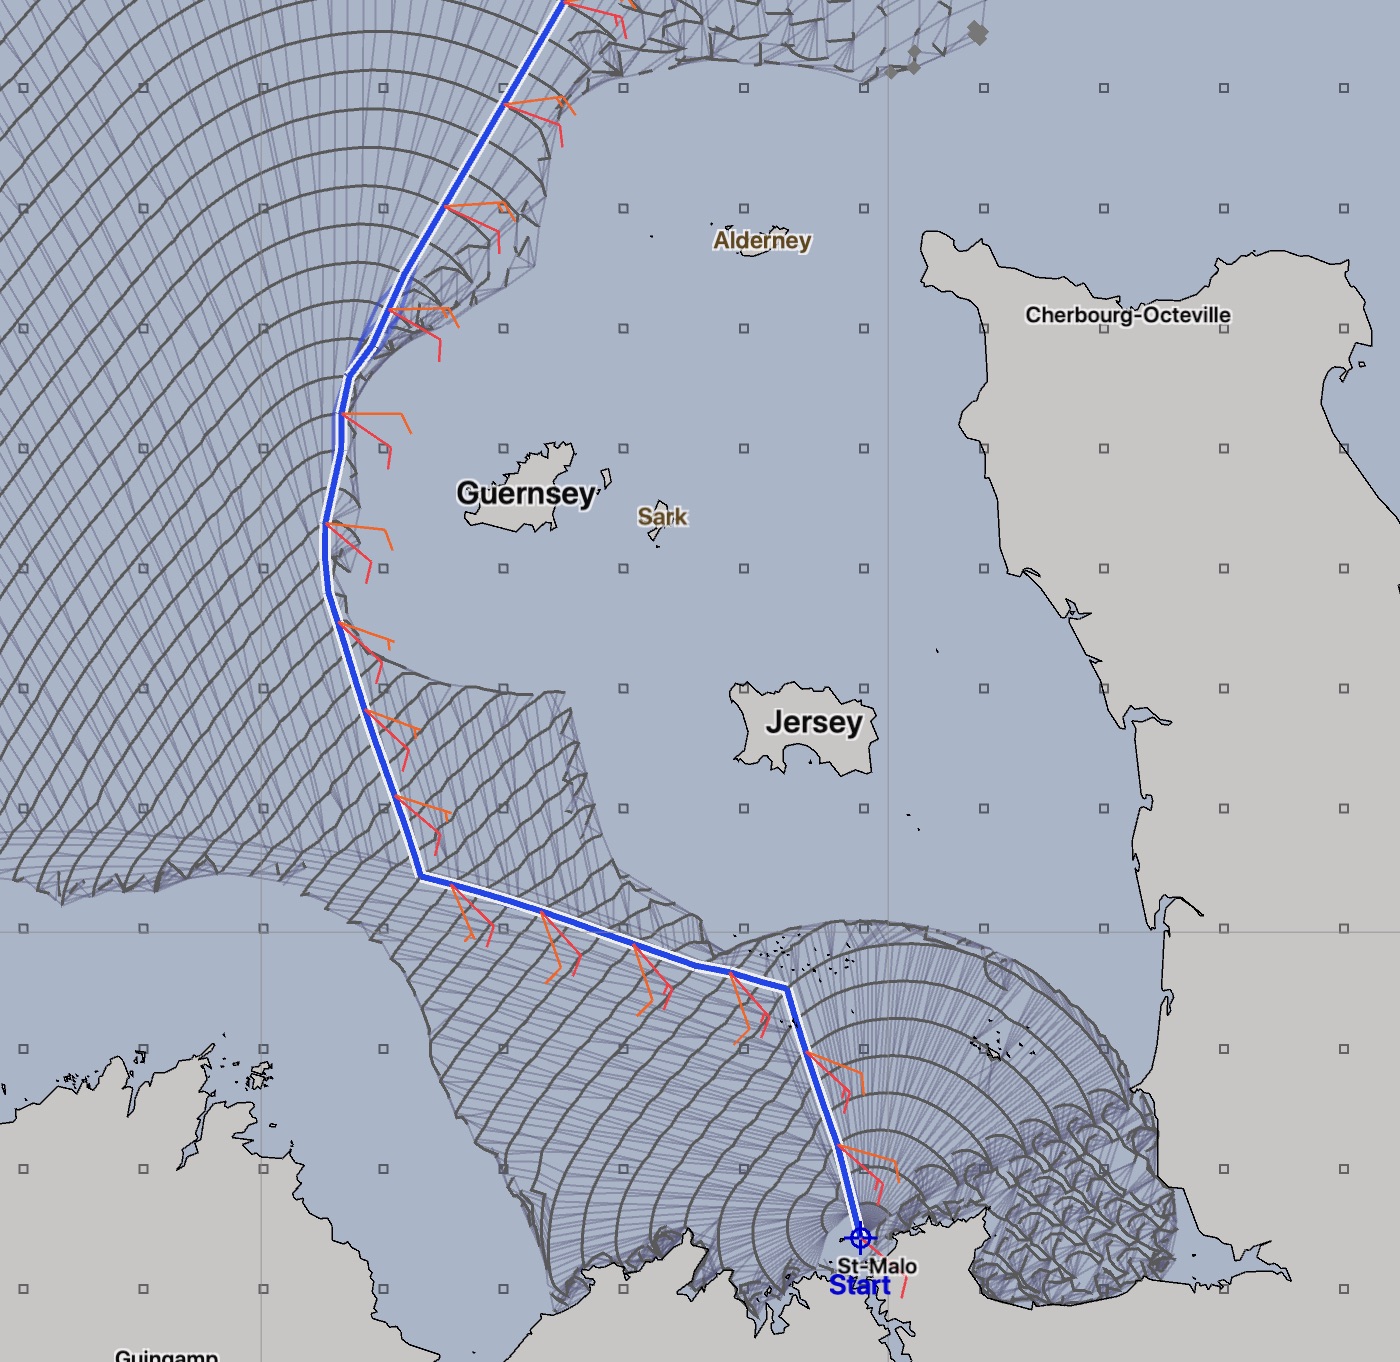
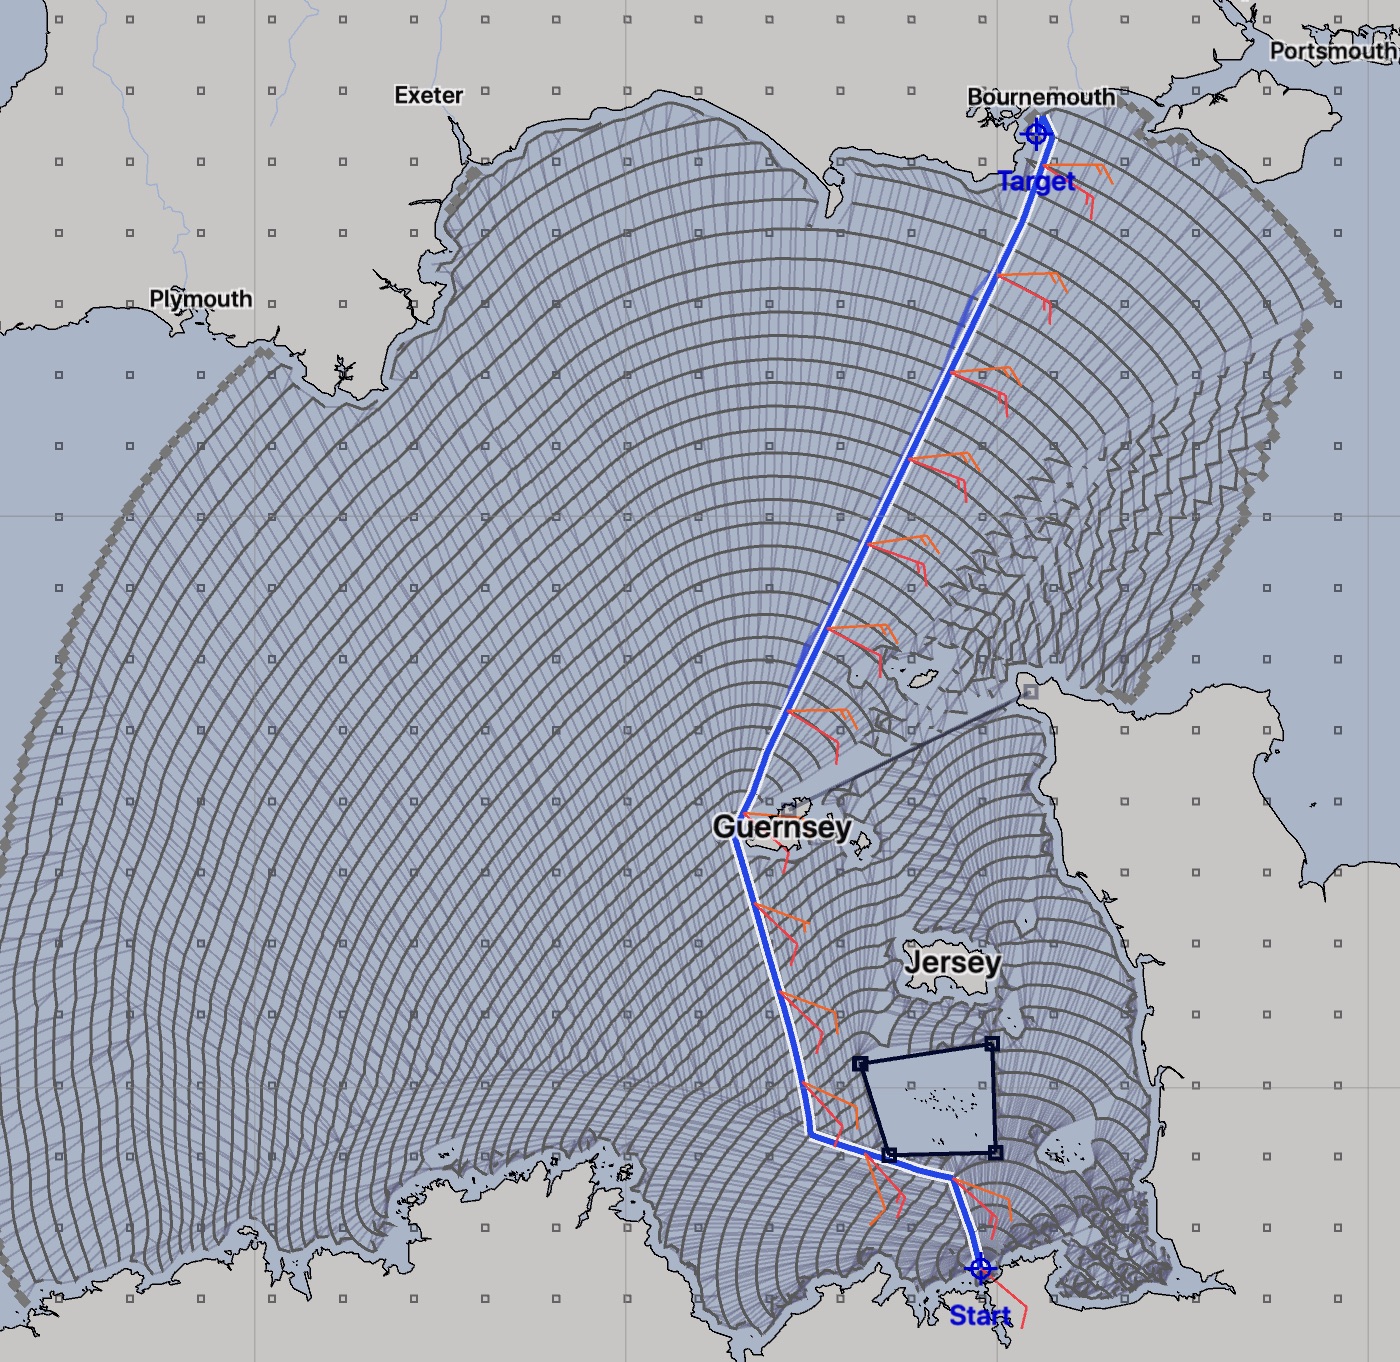
Boundaries will be illustrated with an example route between St. Malo, France and Poole, England. Here is the initial path between these two. Click on either image to see more detail.

Note that the path generated is passing very close to both Jersey and the point NW of Cherbourg.
During this discussion, I will be ignoring tides and current. Also, as LuckGrib is not to be used for navigation, there will likely be many smaller islands in this area, and we have no idea of any of the depths. This example is solely for illustration purposes.
Adding land avoidance.
Often, the easiest way to have the solver avoid land by a wider margin is to set the solvers land clearance distance:
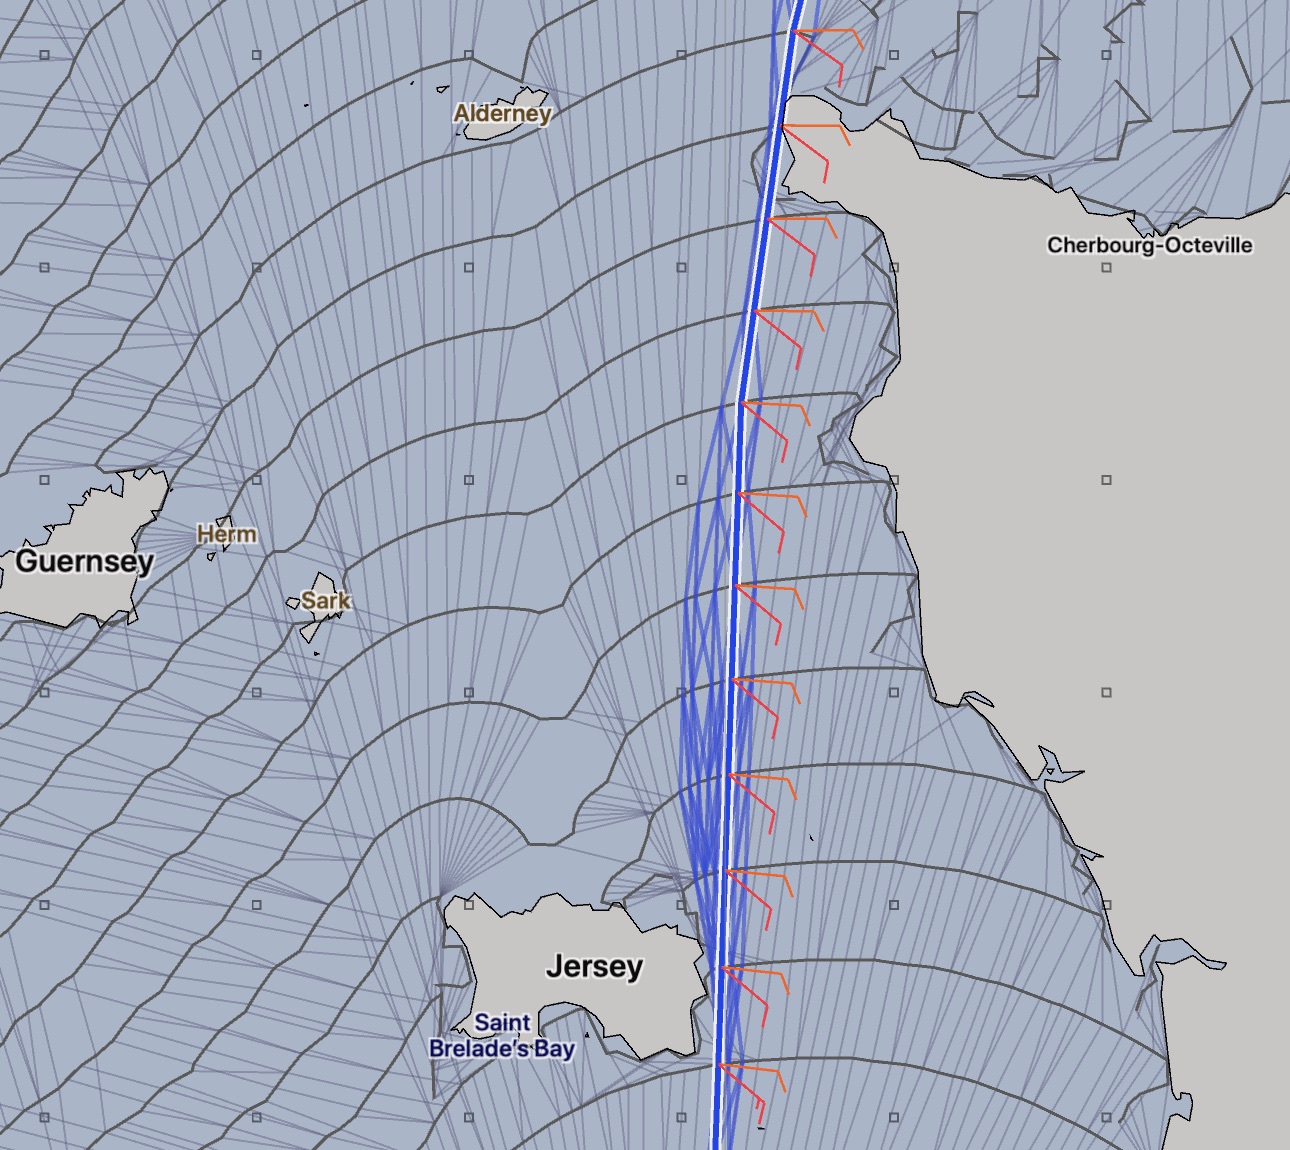
In this case, the solver has been asked to stay 2nm away from land, resulting in an improved route:

That’s an improvement. Maybe. How the path travels east of Jersey and west of the small island north may not be what you want. Lets assume that a sailor familiar with these waters is aware of a navigation problem with the path generated and they don’t want to accept that one.
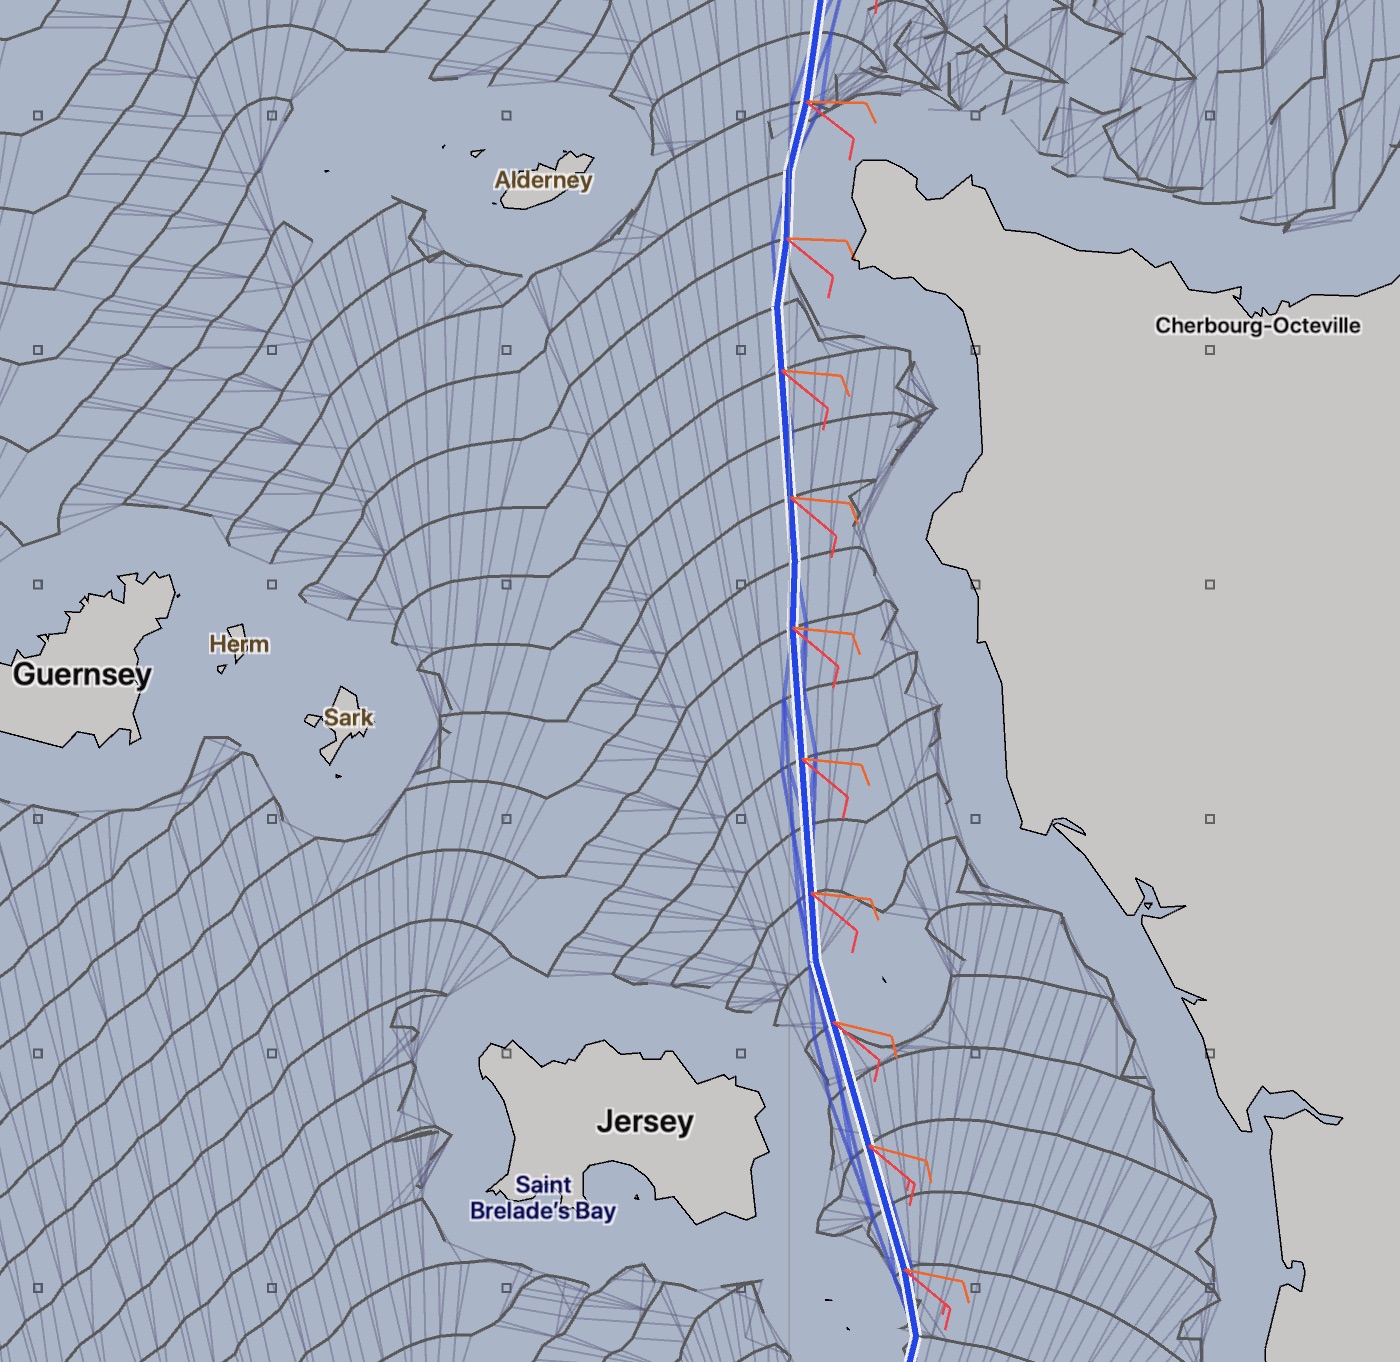
The land clearance value could be increased, trying to stay further away from the islands. However, we reach a point where that approach starts to fail:

The image on the left, with 5nm of land clearance, has a very thin path between Guernsey and Jersey, which may not be desirable. The settings have allowed the solver to sneak through that small gap, and it has done so. If the land clearance value is increased slightly, that route would no longer be available.
However the image on the right looks like it may be failing, as the path is now heading into the islands north of St Malo. Why is that?
Consider what is being requested of the solver. We are asking it to only generate paths which are at least 10nm away from land. However, both the start position and target point are closer to land than 10nm. In order for the solver to accomplish this solution, it relaxes the land clearance value within some radius of the start and target points. If this wasn’t done, the solver wouldn’t be able to generate anything at all (it would immediately fail, which is not considered useful.)
What is needed here is for us to give the solver more precise instruction on the regions we want to avoid.
Boundary lines.
Solving this type of problem is where boundary lines are useful. You can create as many boundary lines as you want, and when the solver runs, it will not generate a path which crosses a boundary line.
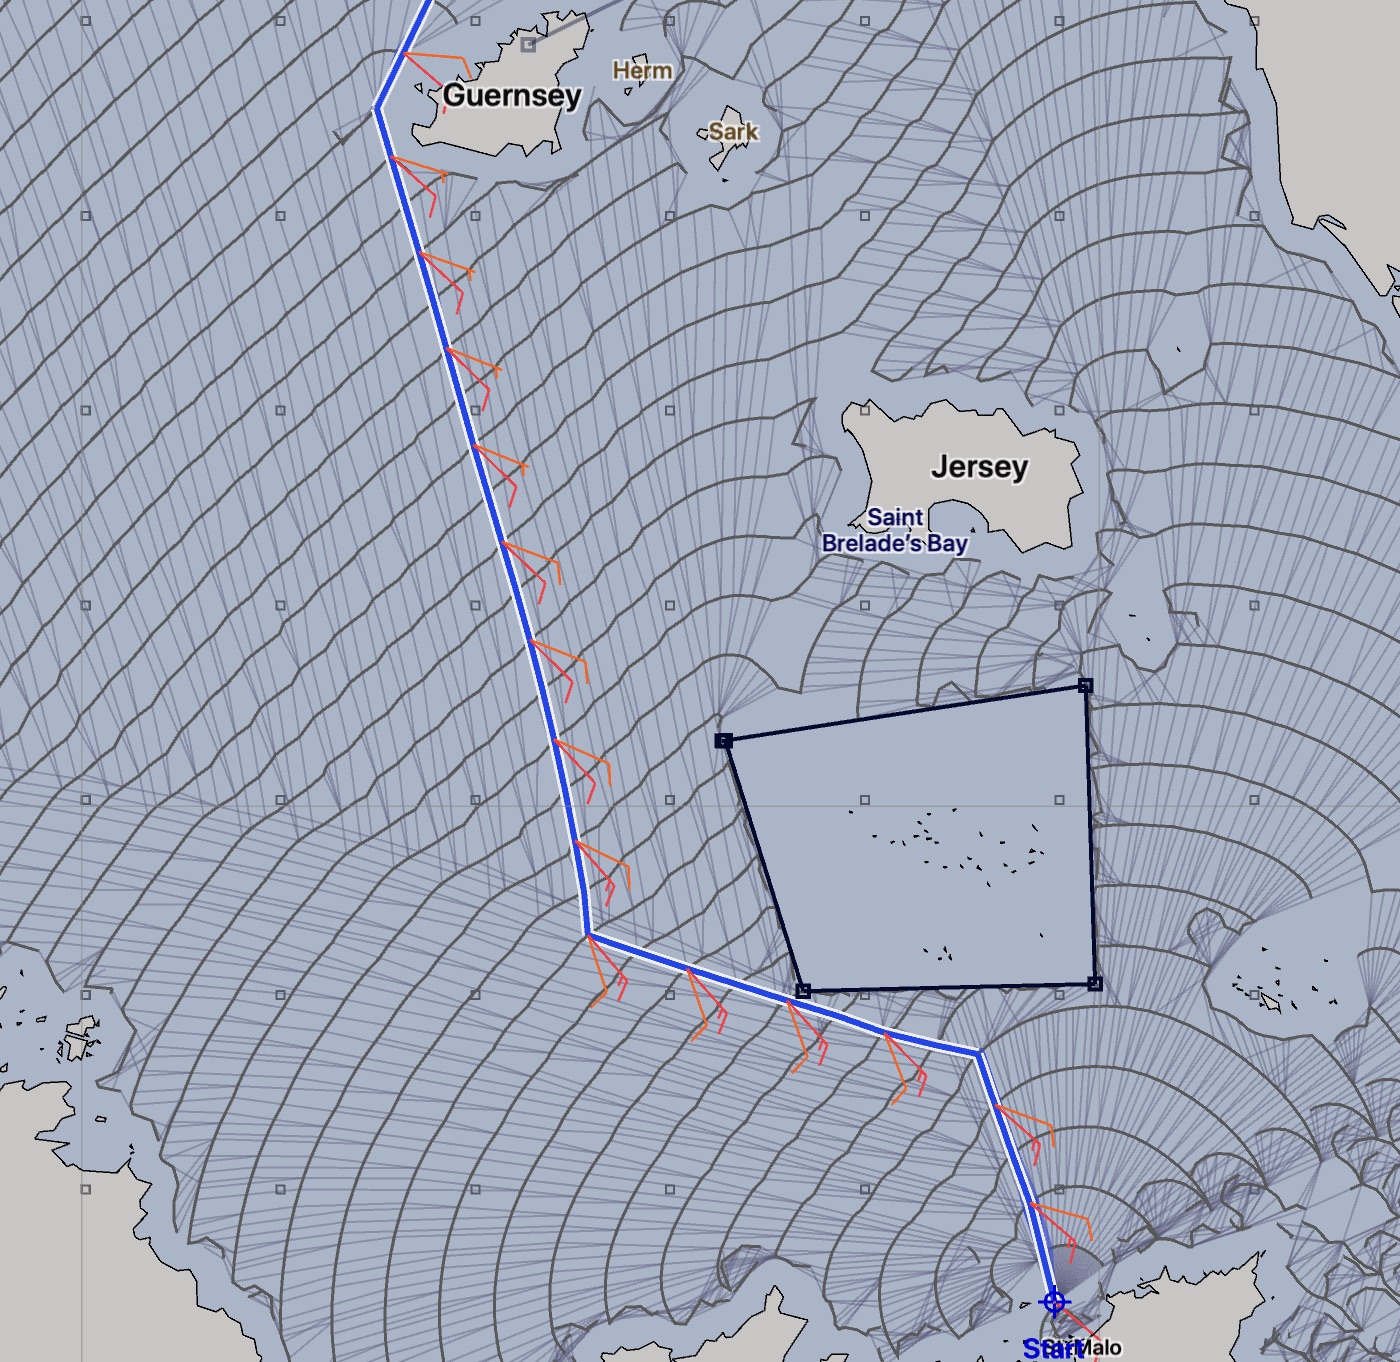
In this pair of images, a single boundary line has been created, which forces all of the paths to only pass west of Guernsey. In addition, the land clearance value has been set to 1nm.

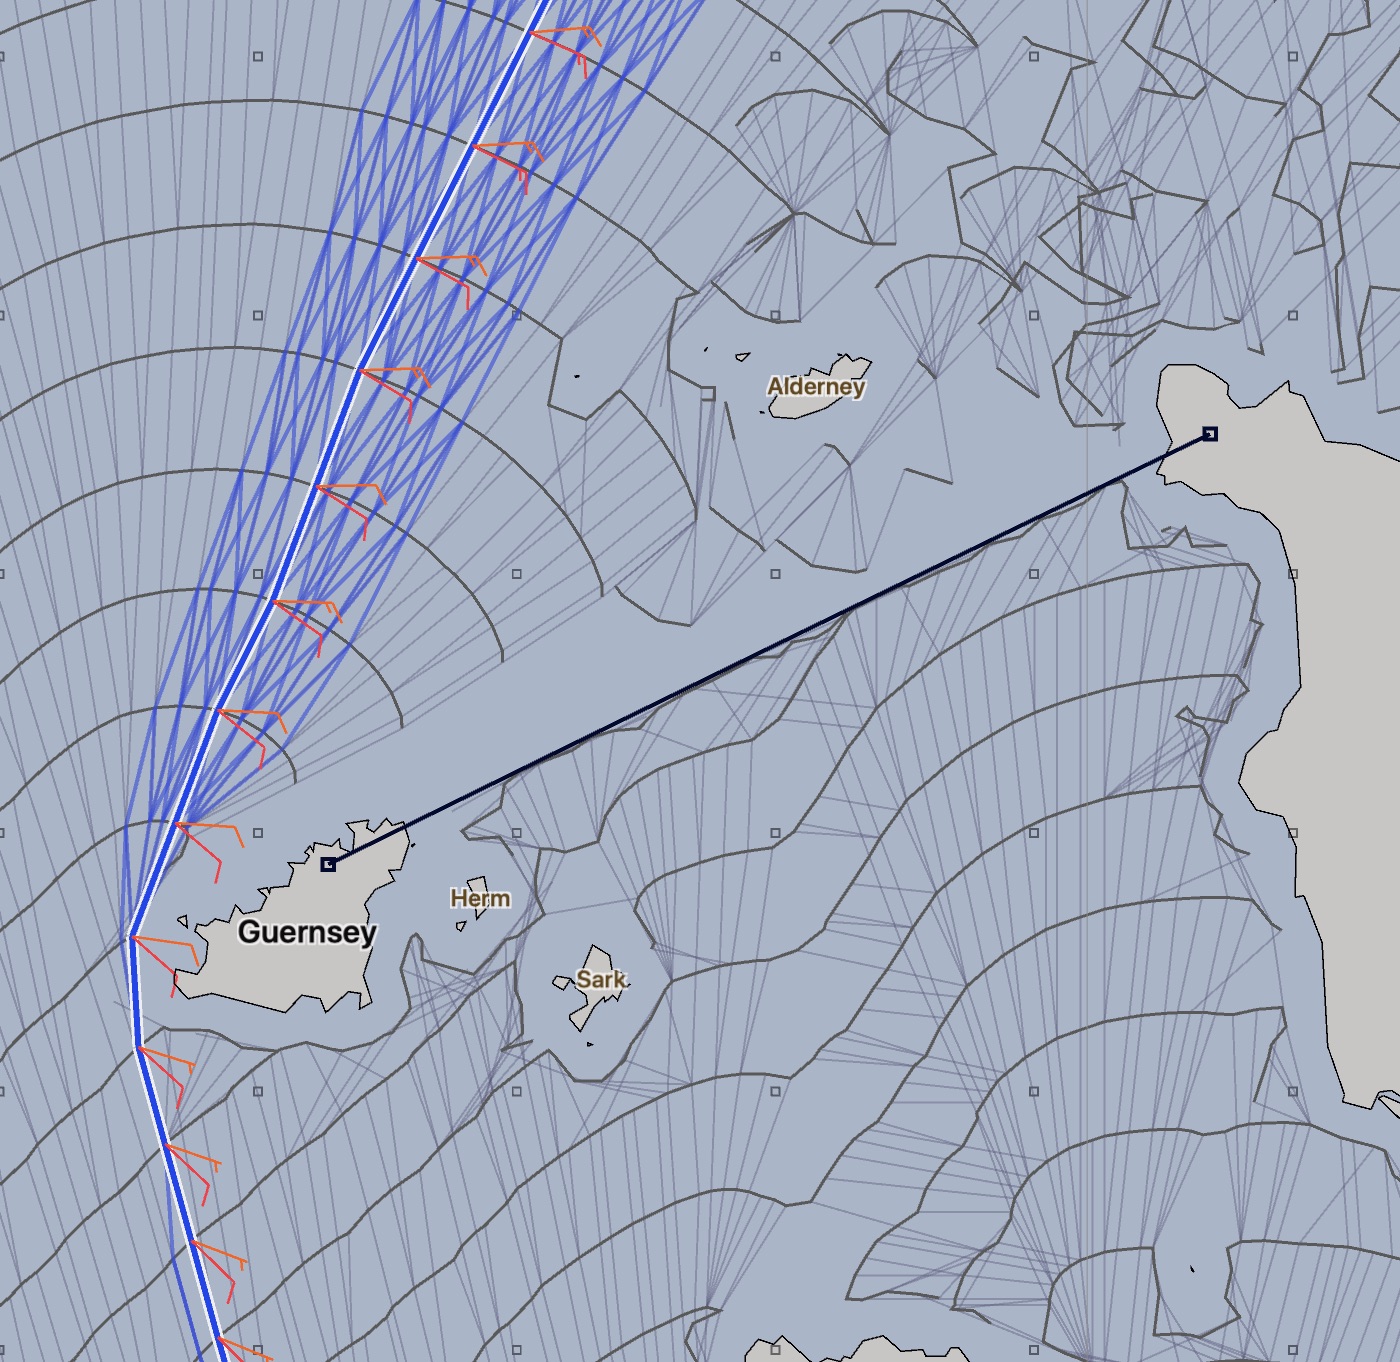
That’s an improvement. However if you look closely, the path crosses through the small islands close to St Malo (as the land clearance value was reduced to 1nm.) This may be undesirable. In this last pair of images, a second boundary has been created which encloses those islands:
Creating boundary lines on a Mac.
This is described in more detail in the user manual.
Briefly, to create boundary lines, you use the Points and Routes tool:

Click down on the map in the area where you want the start of the boundary to be created. When the menu appears, select Create Boundary.
Then click in the area of the other points that form the boundary, and from the menu, select Add point to boundary.
Any of the boundary points can be moved by clicking and dragging on them.
You can insert new points in a boundary line segment by clicking on the line and choosing Insert Point from the menu. Deleting points, or an entire boundary, is done the same way (click on it, select the appropriate menu item.)
You can manage boundaries through the Routes List. Note that you need to choose Boundaries, from the menu at the bottom of the lister:
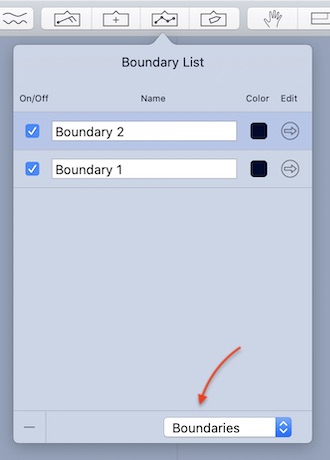
If you have a boundary you want to hide from the solver, this lister is where you can toggle the boundaries visibility. Only visible boundaries are considered by the solver.
Creating boundary lines on iPad or iPhone.
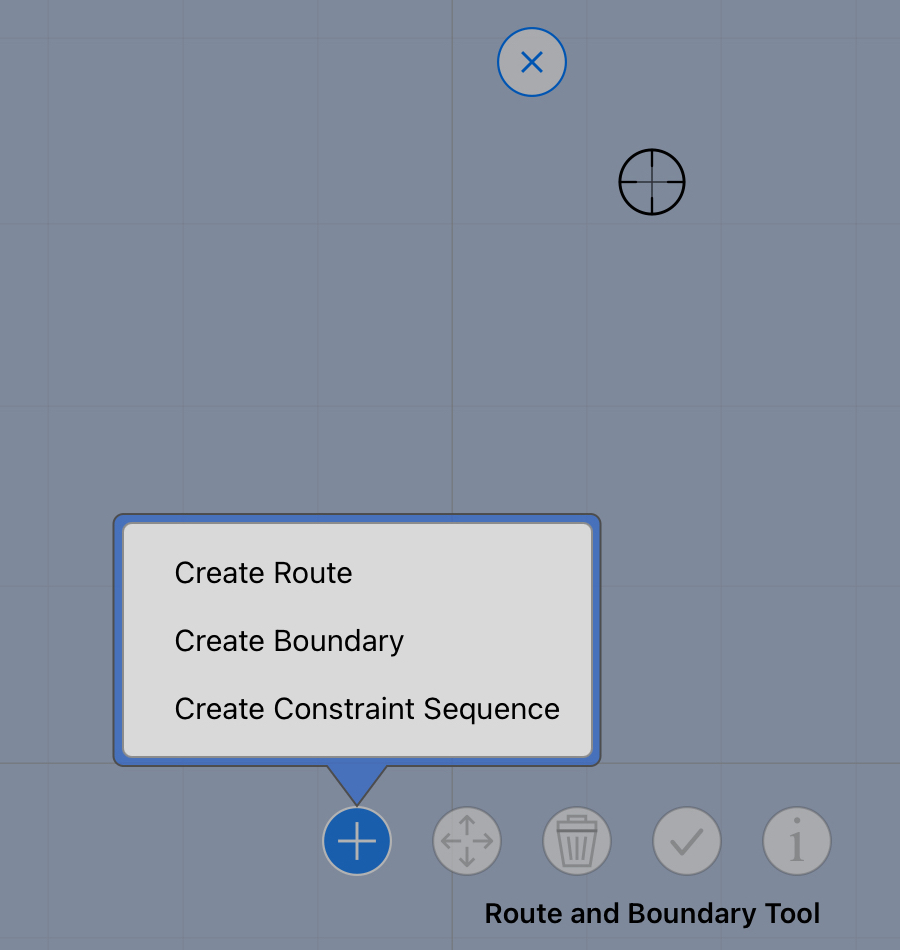
There is a Routes and Boundaries tool, available in the tool area:
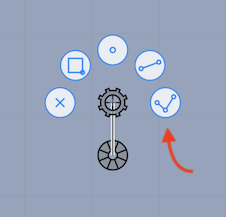
When that tool has been selected, you are able to create and edit routes and boundaries.
The Routes and Boundaries tool is described in more detail, in the manual, but briefly, the buttons allow you to create routes, boundaries, add points to them, move points, delete points and view some information about them.
Once a boundary has been created, scroll the map to the second points location and append it to the boundary already started. Continue this until the boundary has been defined.
You can manage boundaries through the Routing area in the sidebar:
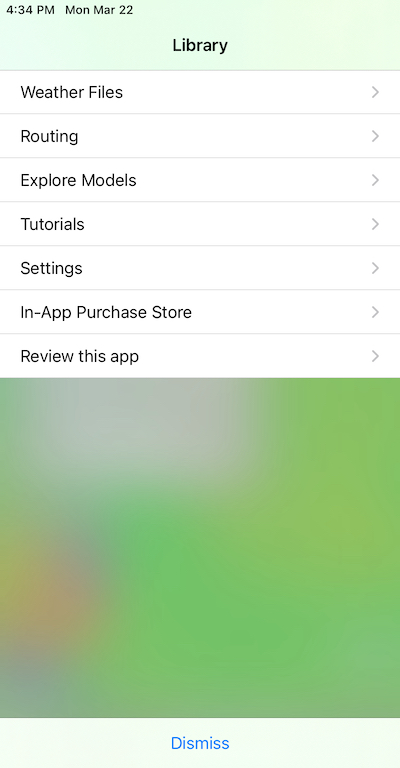

If you have a boundary you want to hide from the solver, this boundary list is where you can toggle the boundaries visibility. Only visible boundaries are considered by the solver.