The four major components of this system are:
- Configuration. There are many configuration settings, although at least initially, many of them can be ignored, as you learn the system. Two pieces of essential information are the starting point and starting time for the weather route.
- GRIB input. You provide GRIB data which describes wind forecasts, ocean current and wave height data. Only the wind data is required. (In addition, multiple wind forecast files can be provided - although this is left as a future, more advanced topic, discussed in the manual.)
- Running the solver.
- Analysing the output. There are many ways to examine what the solver has generated.
Switching modes.
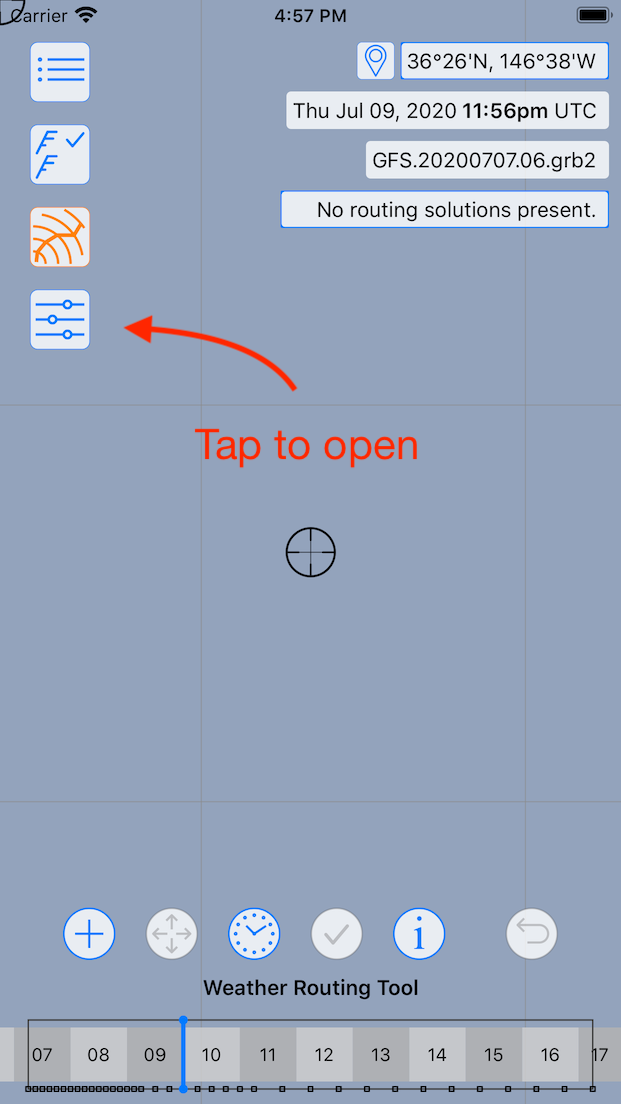
To start working with the weather routing system, you need to choose the weather routing tool, by tapping on the icon on the left, below the draw settings icon:
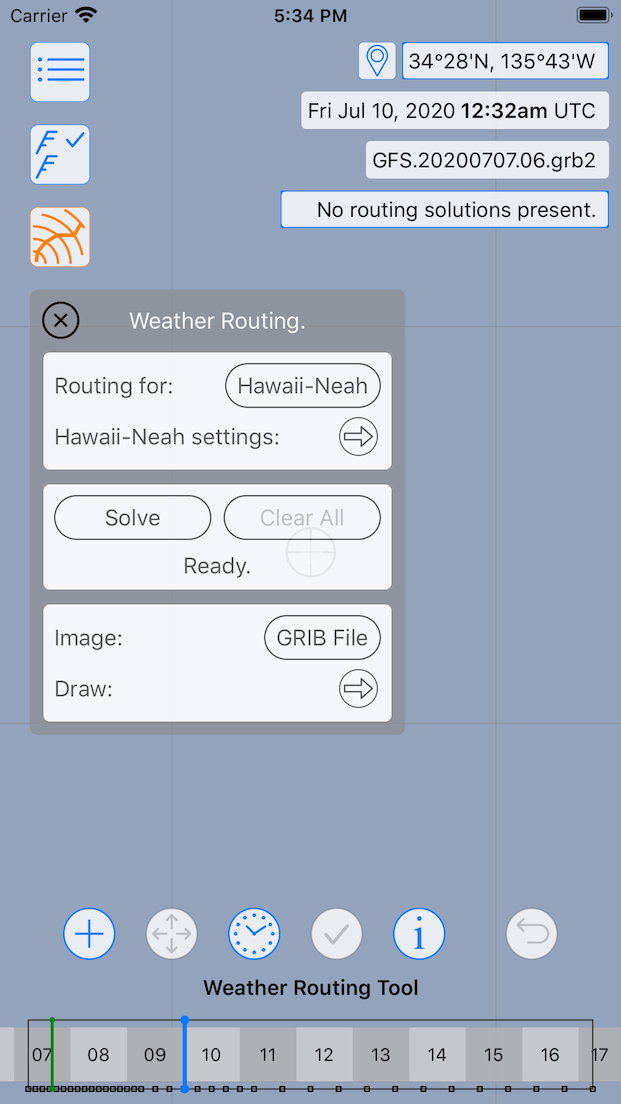
After tapping the Weather Routing tool button, the WR tool is made active and a Weather Routing pane is made available. If the device is large enough, the pane will be opened automatically, otherwise it can be opened by tapping the WR settings button:
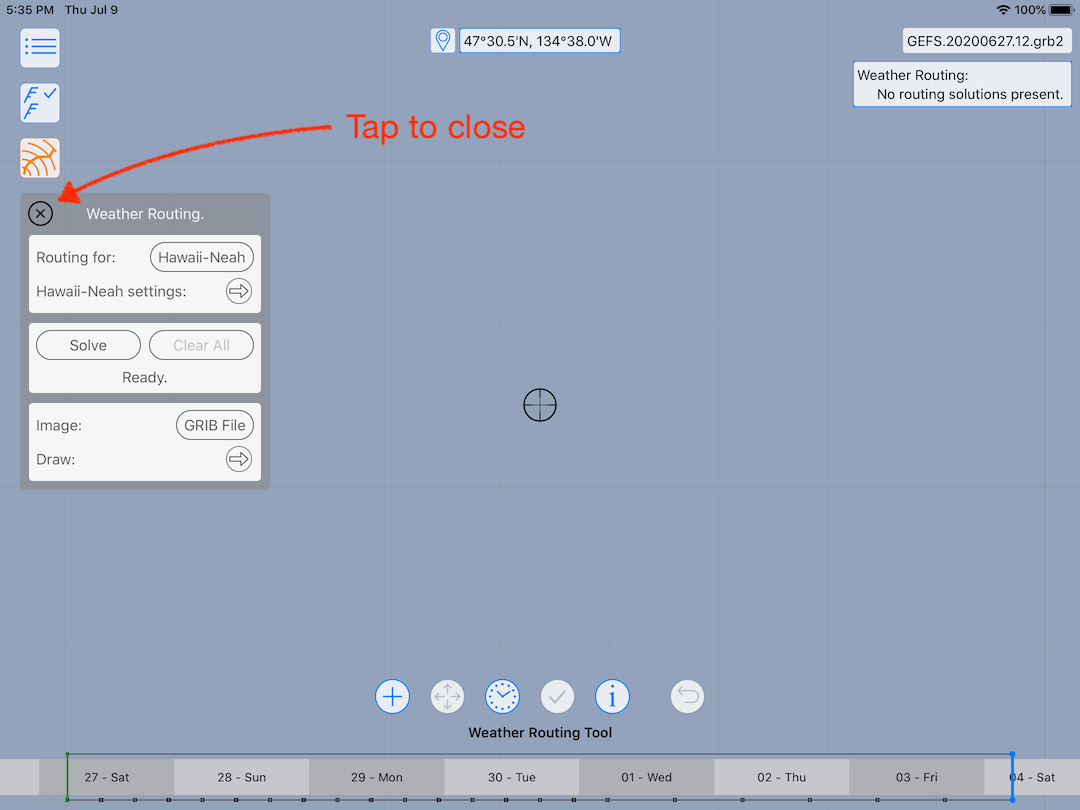 Weather Routing mode on an iPad
To exit the tool, tap the WR tool button again.
The tool is described in more detail in its own section.
Vessels.
Another major component of this system is how the weather routing solver interacts with vessels. The first control in the Weather Routing pane is a button which, when tapped, brings up a menu allowing you to select a vessel. In this case, a vessel named Hawaii-Neah has been selected. Below that vessel button is a settings button which provides access to all of the weather routing configuration settings.
The settings are described in more detail soon. The system is capable of supporting as many vessels as you want to create. Each vessel can have different performance characteristics, be located in a different part of the world, and each has independent settings which describe to the solver what it wants to accomplish.
Sidebar.
There are a number of areas dedicated to weather routing in the sidebar.
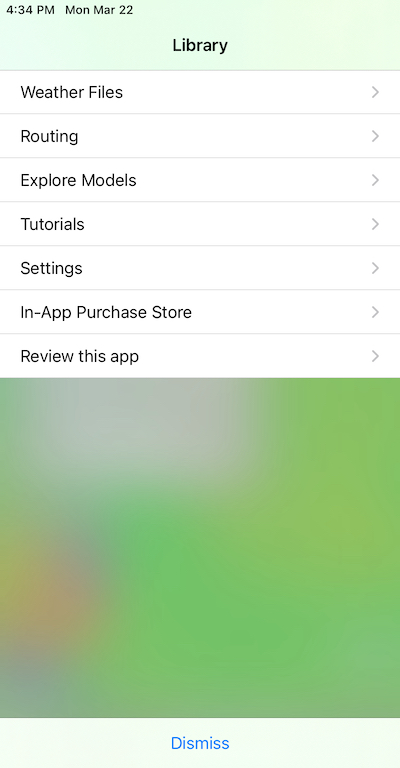

The Routing area of the sidebar allows you to create new vessels; edit vessel parameters such as their names or color; explore the various sailing and motoring polar (performance) diagrams; explore the sailing polar catalog; examine and edit the routes, boundaries and weather routing paths that have been created.
In addition, the Settings area has a weather routing section that allows you to show or hide various configuration settings. The LuckGrib weather routing system has a large number of configuration settings, and by default, not all of them are shown. This is done to reduce the initial complexity of the system. Once you start to learn how the system works, you may want to explore some of the additional configuration settings.
Everything else.
There is quite a lot more to describe. Please read through the other topics in this Getting Started guide for more detail.