Isochronal optimized weather routing allows you to find paths through evolving, complex weather systems. When using the LuckGrib isochronal weather router, you will have an improved understanding of the weather systems and how you can travel through it.
However, if your passage is longer in duration than where there is reliable weather forecast data, then the isochronal solver does not help you reason about the entire passage, only the portion the weather forecasts cover.
Manual routing allows you to plan, and reason about long passages. By combining these two systems, sailors can make plans and understand the entire passage in ways that are not otherwise possible.
An example of a long passage was presented in Introduction | Uncertainty | Long passages.
This page will describe combining automated weather routing with manual routing, as applied to that example.
Choosing an intermediate target point.
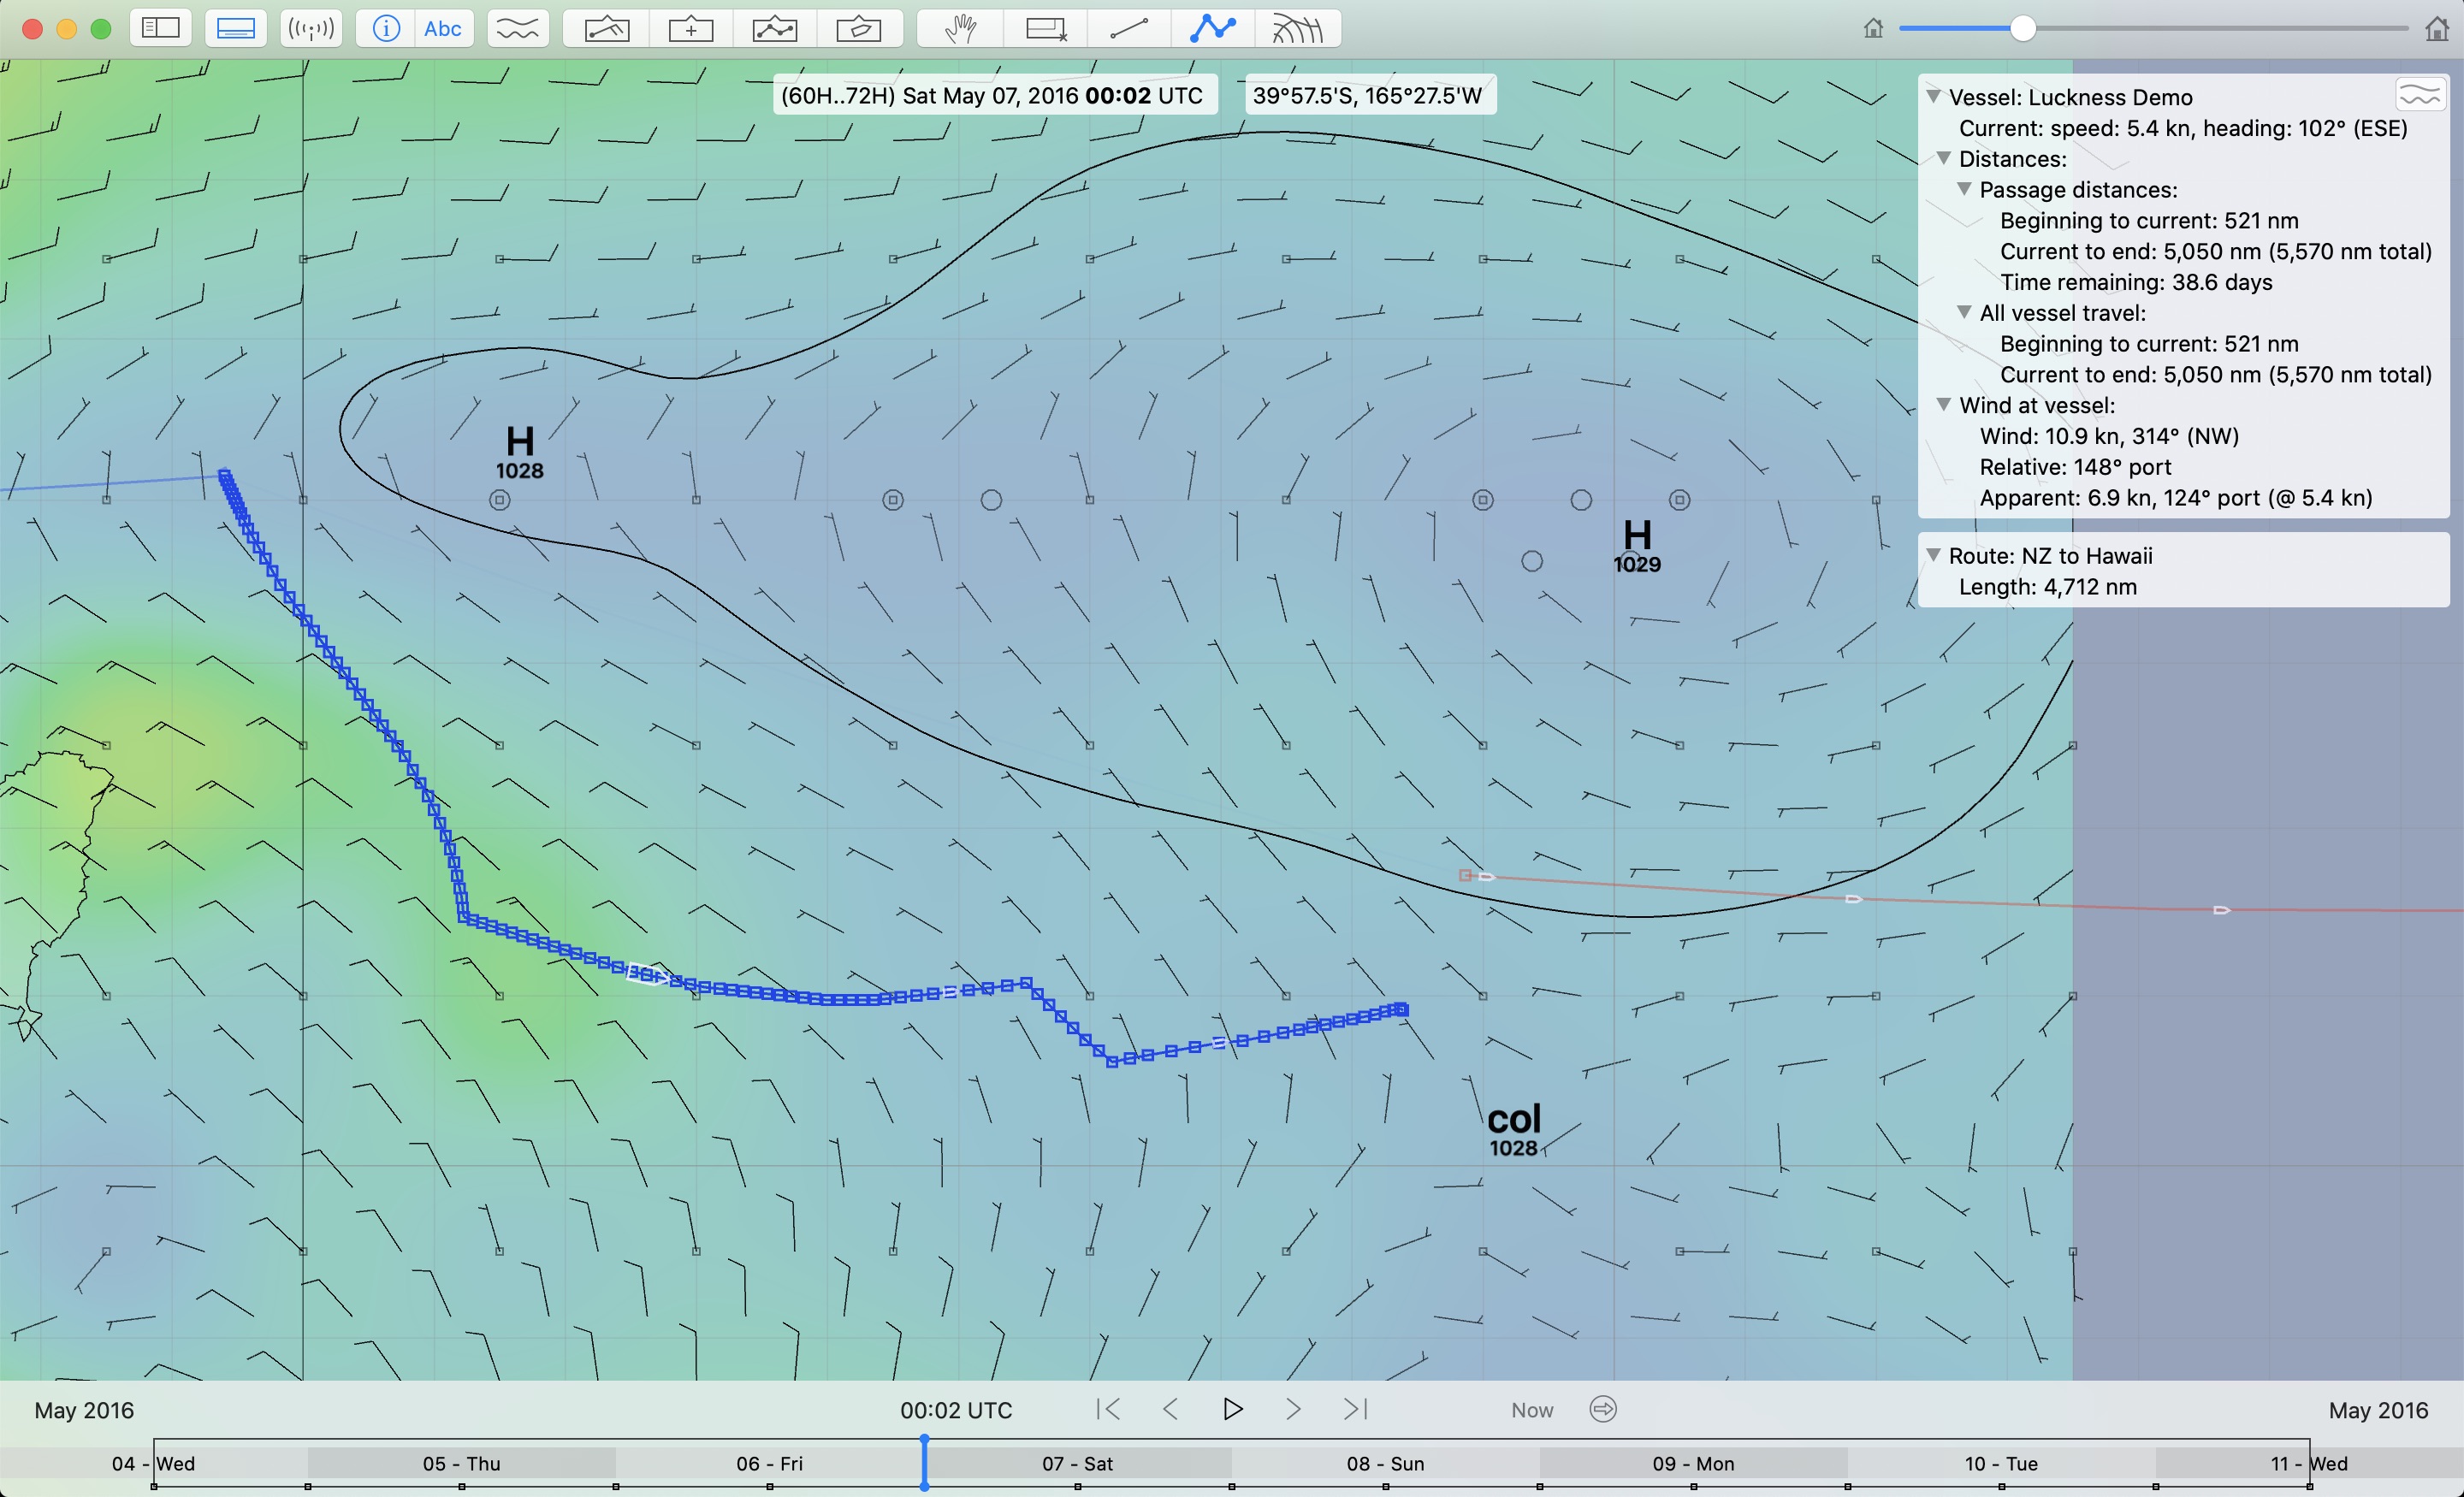
This data is from a passage from New Zealand to Hawaii.
While at the location indicated by the vessel icon, fresh weather data was obtained. Now the weather router solver was run, without a target point being specified. At this point in the passage, there is over 40 days remaining, and the target point will be chosen based on what seems like the best idea at the time.
Using the ability for the system to show a dynamic path, the cursor was moved around, evaluating the different possibilities. Two of these images are shown:
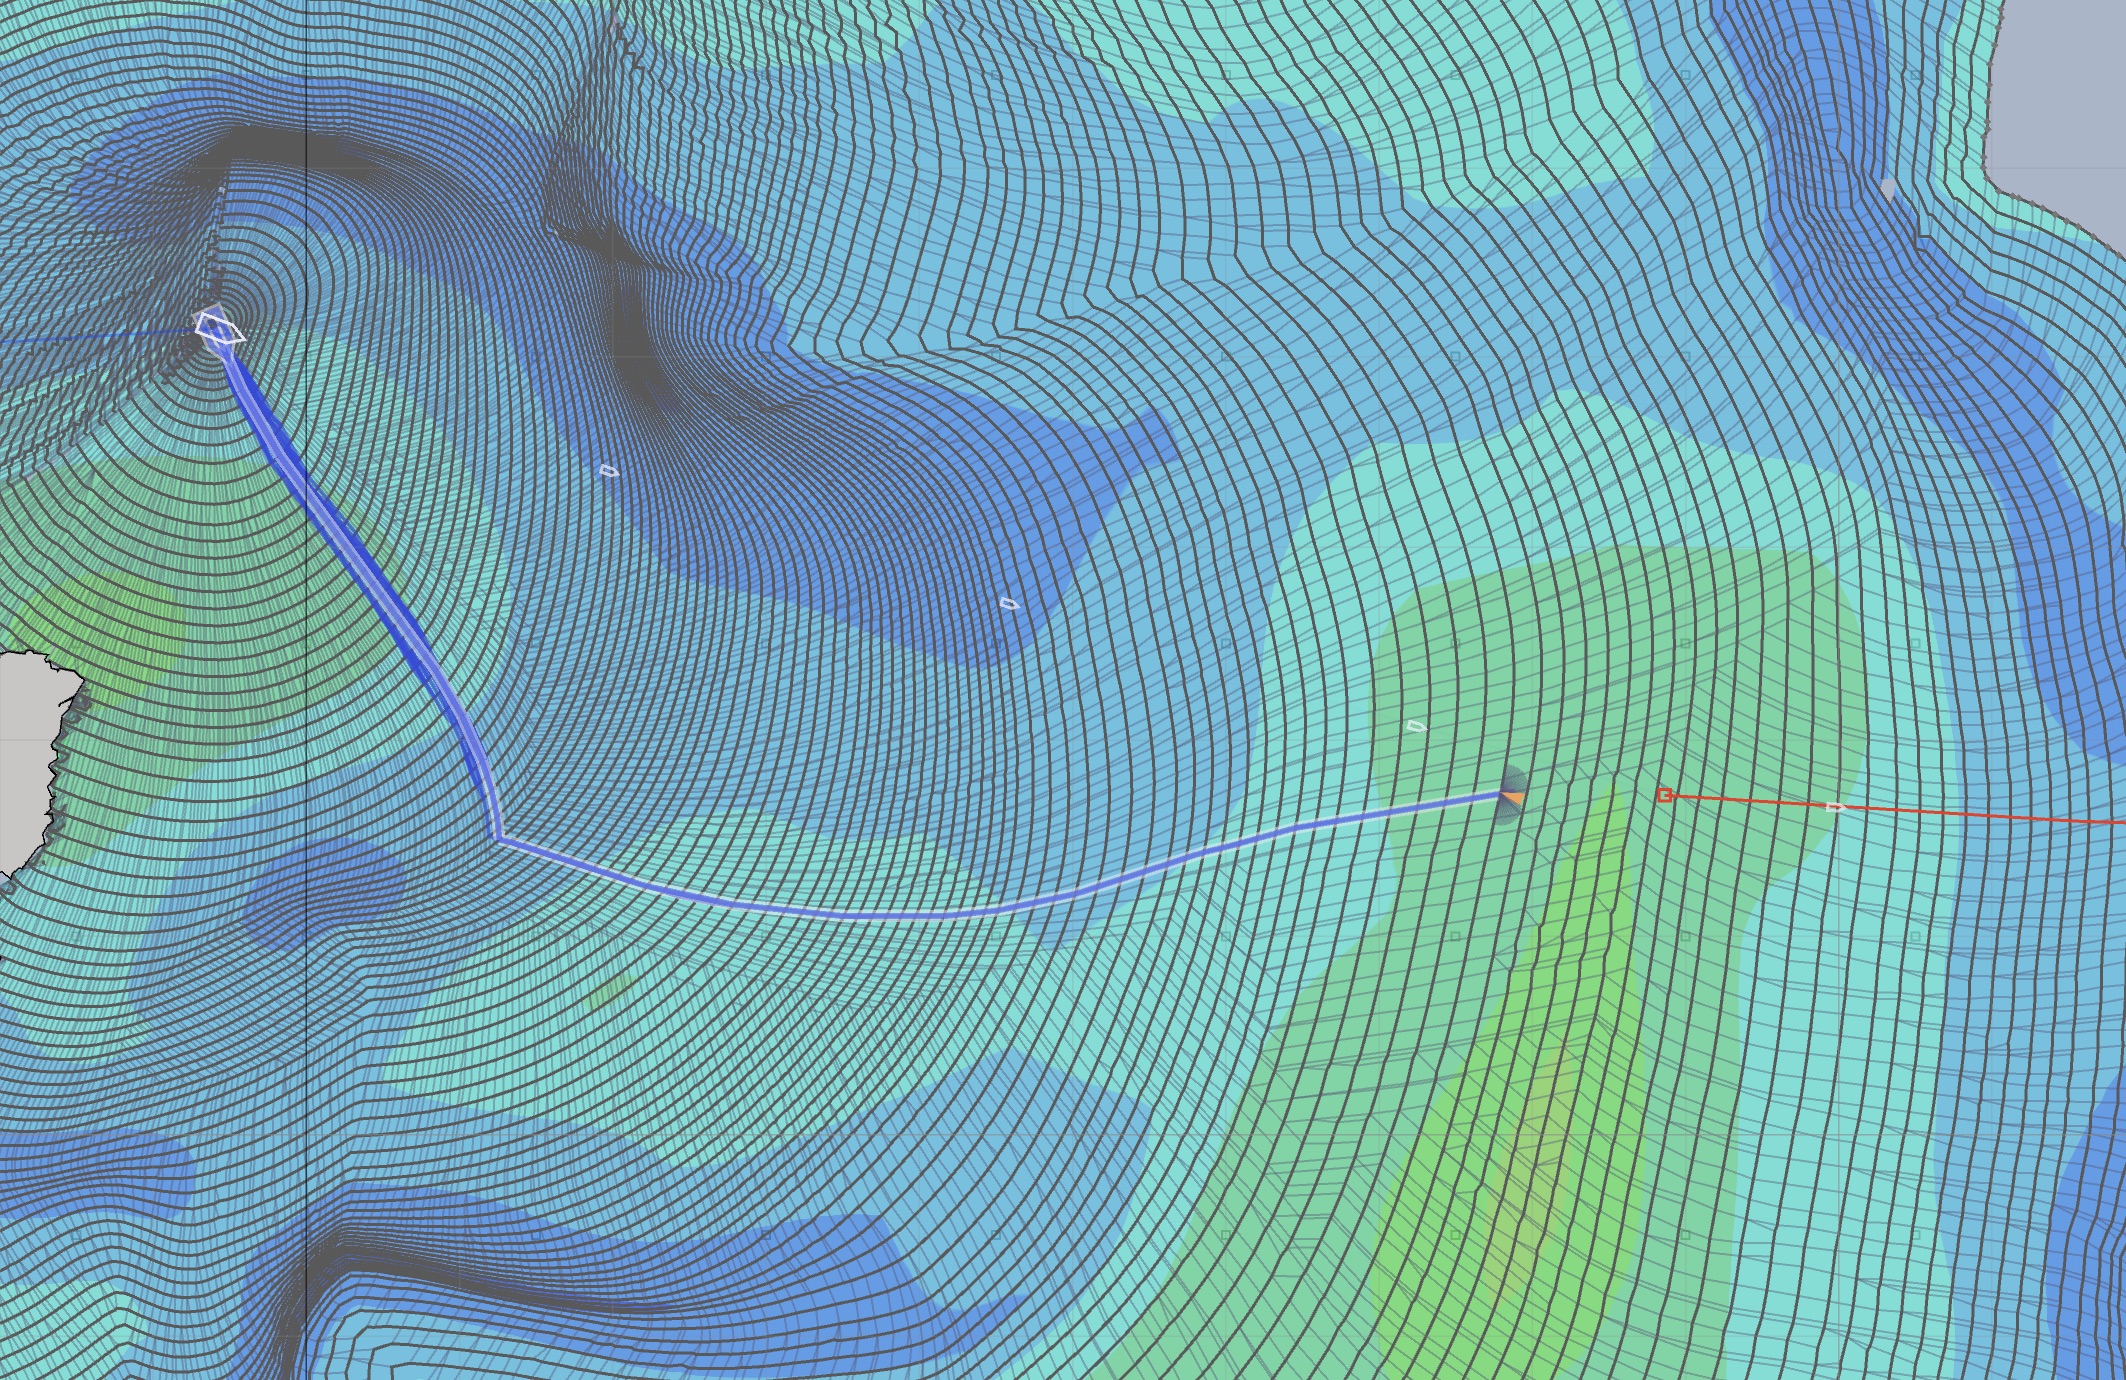 Cursor close to route.
and,
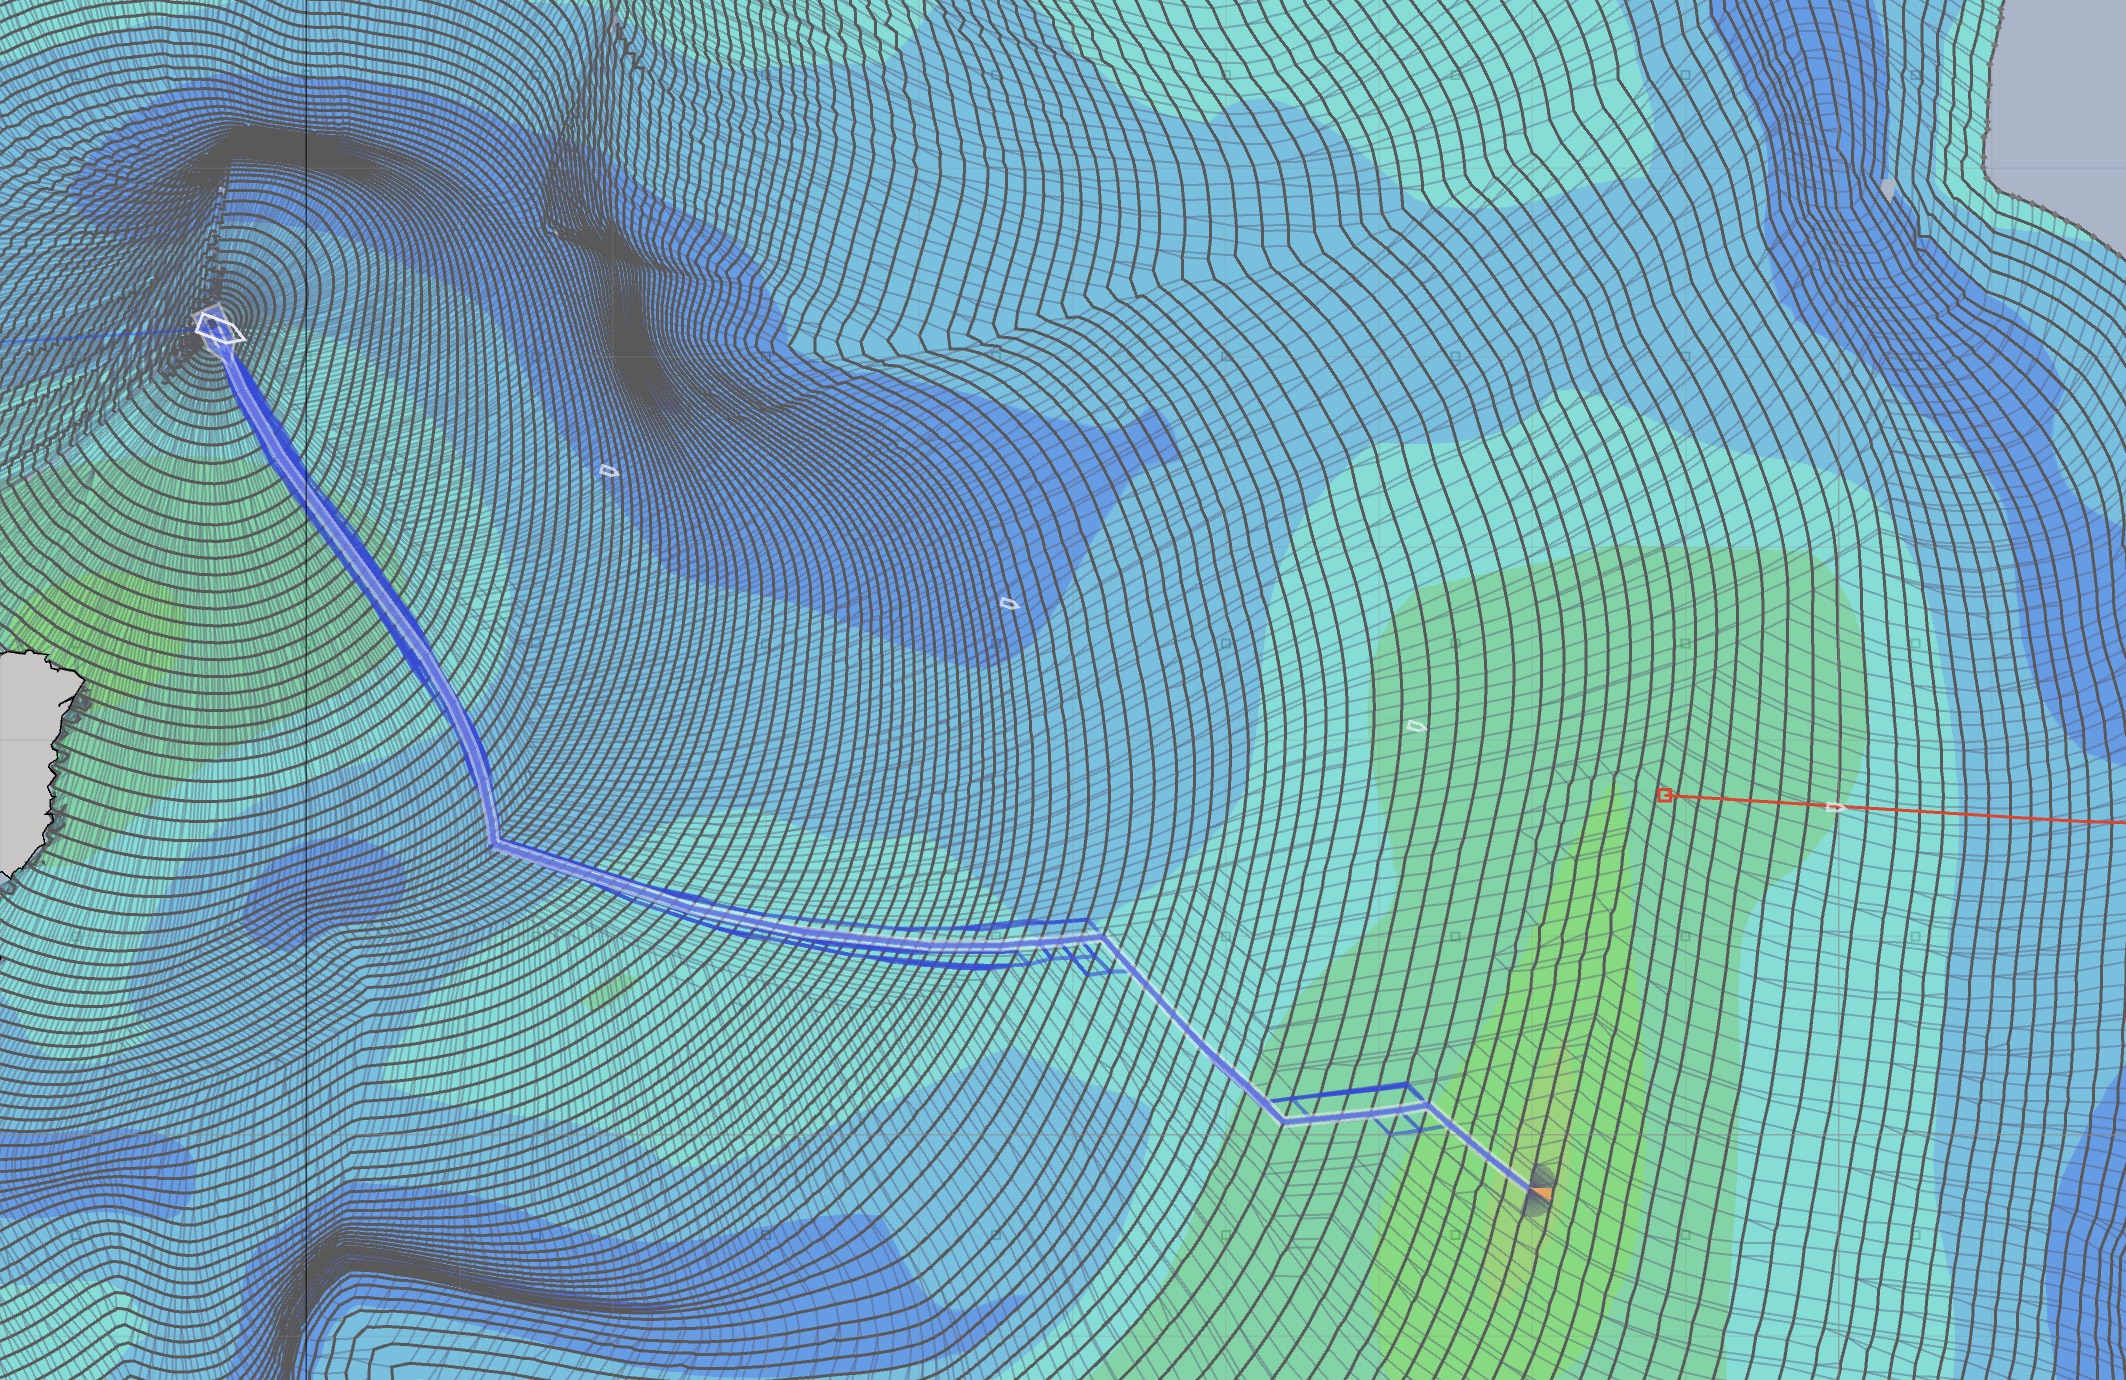 Cursor on area of stronger wind.
Each of those two intermediate target points are attractive as a short term goal. Further north than those two, the winds appear to become lighter. Staying at around the latitude of the strategic route has its attractions, as does seeking out more wind in this, generally, light wind passage. In the first image, the cursor is at around 38°S, in the second it is around 40°S.
Note that these two paths are the same for the first day and a half of future travel. This is ideal, as that pushes this decision out. We can travel either of these paths, and then the next day, download new data and see how the weather systems are evolving.
A target point was created and the solver was run again.
Associating a weather route with a vessel.
The weather routing path has a menu available which has several options. To raise this menu, do one of these actions:
- double click on the path.
- hold down the control key as you click on the path.
- perform the right button click gesture, by performing a two finger press using the trackpad, on the path.

You first need to Save Weather Routing Solution as Route. Once that is done, then open the vessel editor, open the editor for your vessel and select the WR path just created as the path that should be followed:

After associating this path with the vessel, the weather routing path can be cleared, and the remainder of the system will still be able to follow the path that has been associated with the vessel.
Attached path and full solution space.
Note that the two images presented above, where the solution space was being evaluated to choose an intermediate point, were showing the full solution space. Once an intermediate point was chosen and a path generated, the isochrones stop at that intermediate target. That’s how the isochrone algorithm works.
However, when on passage, what you want is both of these.
- you want to be able to see the full solution space so that you can properly evaluate all of the weather data you have available. This is useful, even though the uncertainty of the data later in the forecast is growing and growing.
- you want to be able to choose an intermediate point, based on your best judgement, for which of the many available paths gives you the best navigation opportunities in the future.
Once you have attached the short term, tactical weather route path with the vessel, you can go back and remove the target point and create the full solution again. This gives the best of both system. This is a unique capability in LuckGrib.
Two possible meteograms.
When a meteogram is shown in the WR system, only the GRIB parameters that the solver used are available. This includes wind, wave height and possibly current.
When you use the meteogram available from the Points and Routes tool, all of the available GRIB parameters are shown. This could include: pressure, rain, simulated radar, and any others you have downloaded.