LuckGrib supports the creation of multiple vessels. Each vessel has its own, independent, set of weather routing settings. It also has other properties such as a list of of position reports, a color, a route it may be following, and more.
If you have never used the ability to create vessels in LuckGrib before, then when you start to use the weather routing system a default vessel will be created for you, named Default Vessel.
If you have used the vessels feature before, then, for the purposes of this getting started guide, you are encouraged to create a new, fresh, vessel. Give it a name such as Testing or something simple. Later, you will read how the weather routing and manual routing are integrated into a powerful system, but for now, try to keep it simple during the learning process.
You create a vessel via the Vessel List editor:
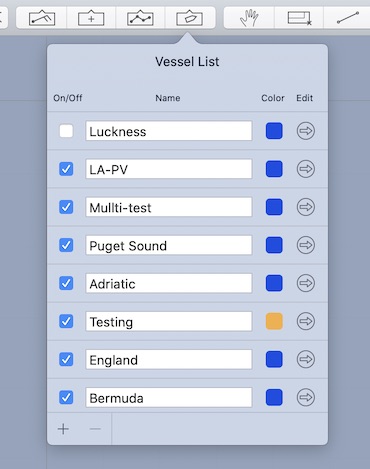
To create a new vessel, click on the little + icon in the bottom left corner. A menu will appear with an option to create a new vessel.
You are also able to copy a vessel using this editor. Again, click on the little + icon in the bottom left, and select the copy vessel menu item. Copying a vessel can be an easy way to perform a short experiment, with different WR settings, position reports, and so on.
You can delete a vessel by first selecting the vessel by clicking in the background of the row it occupies (this can be a little tedious, click outside the area of the name field, and the other controls, in the background of the row.) Once the vessel is selected, click on the little - icon to delete the vessel.
This editor is also where you rename a vessel, so if the system created Default Vessel for you, it can be renamed here.
Undo is available for all changes.