
This page describes how to create and edit position reports associated with a vessel, using the Points and Routes tool.
Position reports are used to record where a vessel is at a particular time. If you allow position reports to accumulate, the track of a vessel can be recorded.
Undo is supported for all of the following operations, except for selection, which is transient.
Selecting a vessel.
Position reports are associated with a vessel. When you create a new position report, it is added to the currently selected vessel.
You can select a vessel by clicking on any position report in its track, if it has position reports.
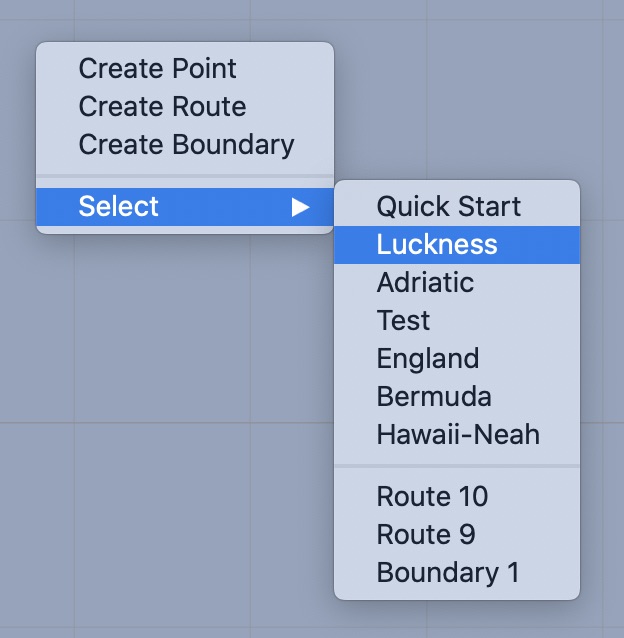
You can also select the vessel through a menu. Click down in the view, away from any points, routes or tracks, and a menu will appear. From this menu, you can select any of the visible vessels or routes in the system:
Creating position reports with the tool.
When the vessel you want to work with is selected, you can create position reports for it using the Points and Routes tool.
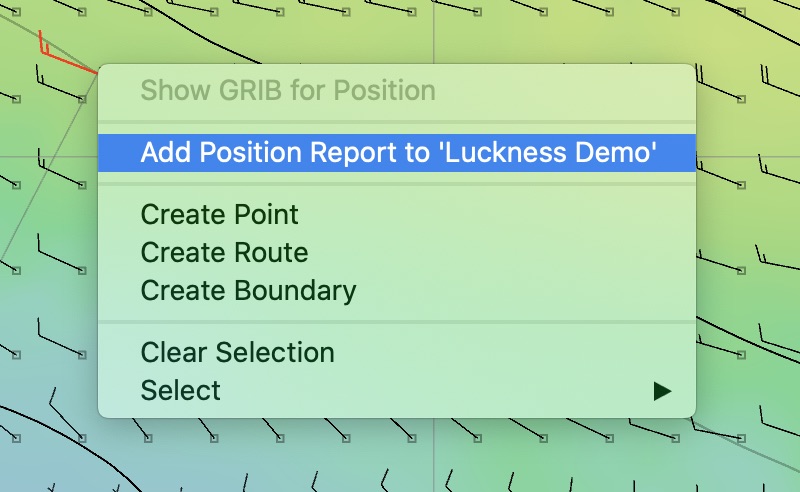
Position reports combine both a position and a time. When you have a GRIB file selected, set the time in the timeline to the time you want the position report to record. Then click down in the view, away from all points, routes or tracks. A menu will appear with an option to create a new position report:
This technique for creating position reports may be useful for positions close to shore where there are land references you can use to locate positions accurately, however for vessels at sea, where there are no map references to see, the following technique is much easier.
Creating position reports by typing them in.
The Create Points editor can be used to accurately and easily create position reports for a vessel. This is the preferred method to create position reports while on passage.
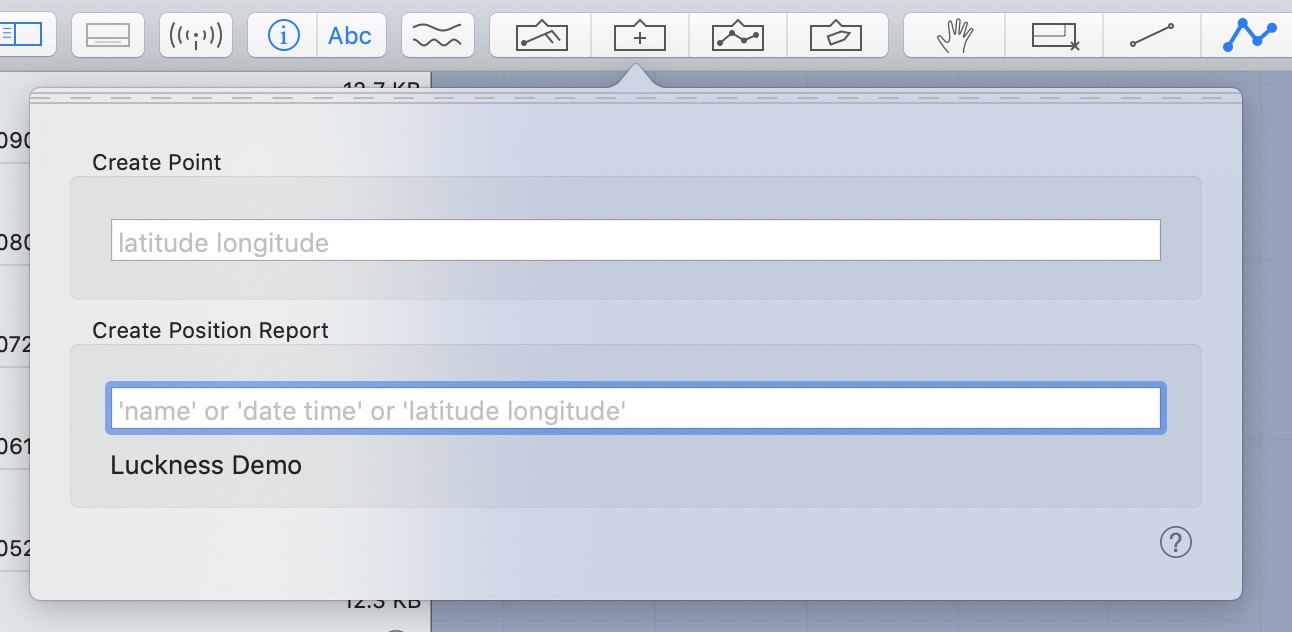
The lower field in this editor allows you to create position reports. Using this text field, you can specify the vessel you want to create the report for, the time of the report and the reports position:
Select the vessel. The editor shows the currently selected vessel, by name, in its lower line. If the correct vessel is not selected, type in its name. You can abbreviate the vessel name, as long as the abbreviation uniquely selects the vessel.
- Choose the time. While on passage, the easiest way to select the time you want is to type in ‘now’. Typing ‘now’ sets the editors time to the current time of day. If you want to choose a different time, the editor accepts a wide range of date and time formats.
- When the correct vessel and time are set, type in the position for the new report.
A few examples of providing the time to use are:
nownoon1pm1am UTC1pm pst2/14 5pmfeb 20 1:302 feb 6pm
The position can be entered in a variety of forms. There are a series of simple rules:
- latitude is first, followed by longitude.
- you can specify degrees, minutes, seconds for each, but the same form must be used for both.
- if you do not provide the quadrant (N / S / E / W) it defaults to the where the previous position report is.
The most common format is degrees minutes, for both latitude and longitude. An example of the most common way to enter a position report is to type the following three lines, hitting the return key after each line:
luckness
now
35 13 174 13
If you need to provide the quadrant, as this is the first position report, or you are crossing the equator, dateline or prime meridian, then you can do so by adding the appropriate letter (N / S / E / W) to the coordinate line. The letters can appear anywhere, with or without spaces between them. All of the following lines are the same:
35 13 174 13 sw
35 13 s 174 13 w
sw 35 13 174 13
Editing a position report.
As is true for points (way points) and route points, you can bring up a menu for a position report. As in the remainder of the system, the way you bring up the menu for an object, is through one of the following techniques:
- double click on the position report.
- hold down the control key as you click on the position report.
- perform the right button click gesture, by performing a two finger press using the trackpad, on the position report..
When you bring up the menu for a position report, the menu you see will be:
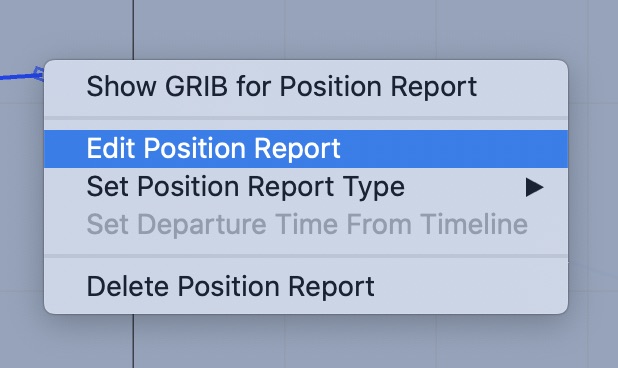
After selecting the Edit Position Report menu item, you will see the following editor:

This editor allows you to change a position reports location or time, as well as add a comment or specify its type. Position report types will be described in Passage start / end.