This page describes how to create and edit routes, using the Points and Routes tool.
Undo is supported for all of the following operations.
Creating routes.
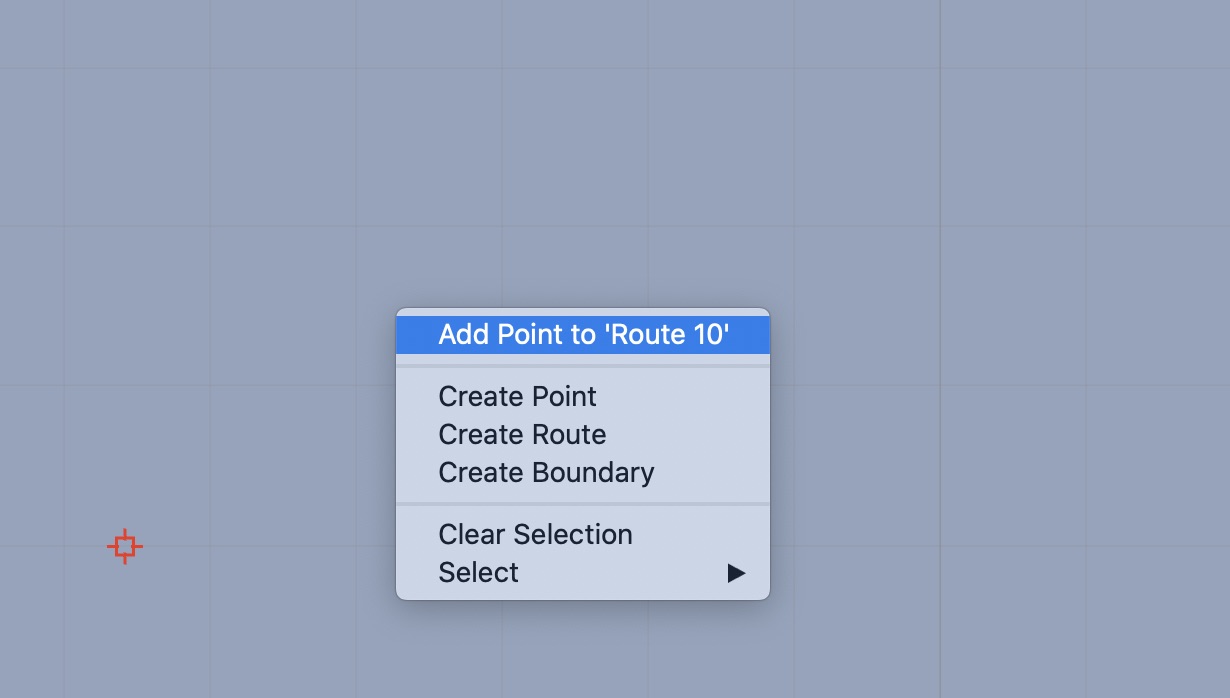
When the Points and Routes tool is active, any click on the map, on empty space, will bring up a menu:

To create a new route, select the Create Route menu item. A new route will be created, starting at the location you first clicked down on the map.
Single or multiple point routes.
The shape of the route you create will depend on the length of your passage, and your strategy for how you want to move toward the destination.
A single point route is useful, and can be used to describe an intermediate target point. Routes consisting of a single point may be all that is required to work with the system. However, if you have a longer passage which involves changes of direction, and are interested is seeing some metrics on its possible length and duration, a multiple point route can be created.
You are encouraged to not create too much detail into the routes you build. Keep the routes fairly sparse. Detail will be added, as necessary, as you are making tactical decisions for short term travel. These short term travel tactics can be created using the isochrone weather router, rather than doing it manually.
If you have a situation where you are generating many different weather routes, or have an opinion on your preferred travel, you are also able to analyze the weather routes generated and then modify the route created here to reflect your decisions on how you prefer to travel.
Building and editing a routes.
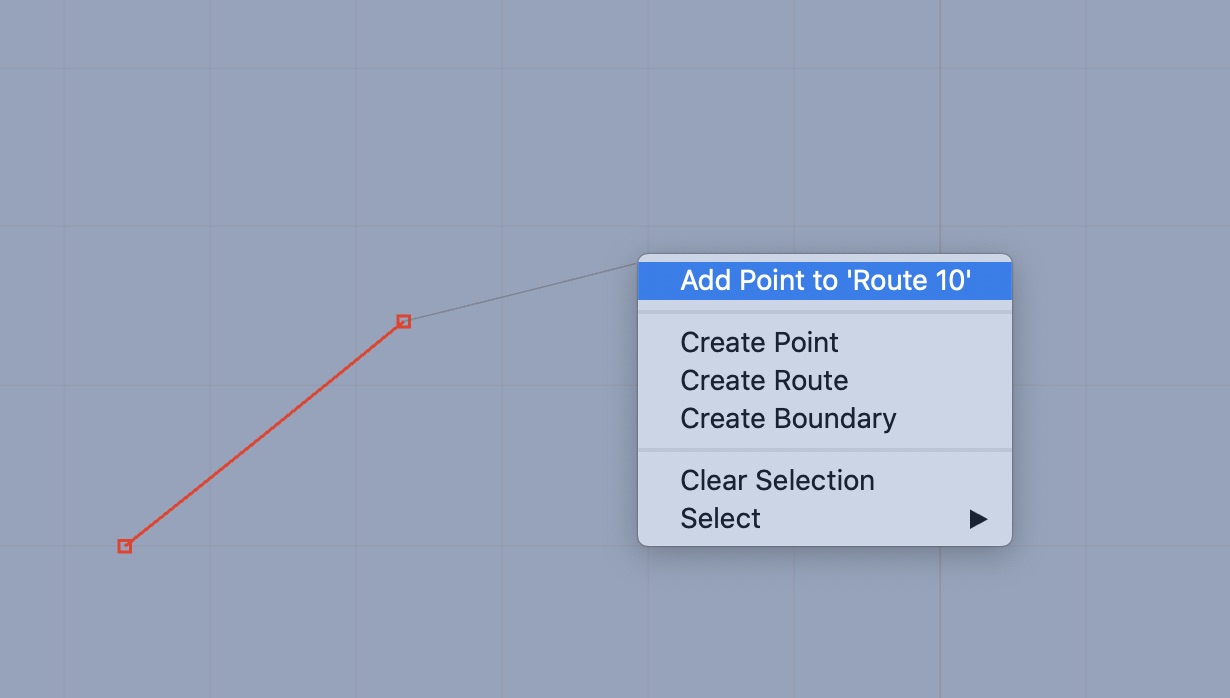
After creating the initial route point, additional points can be added:
Any point can be moved by clicking on it and dragging.
You can insert points into a route by clicking on the route between any two points:
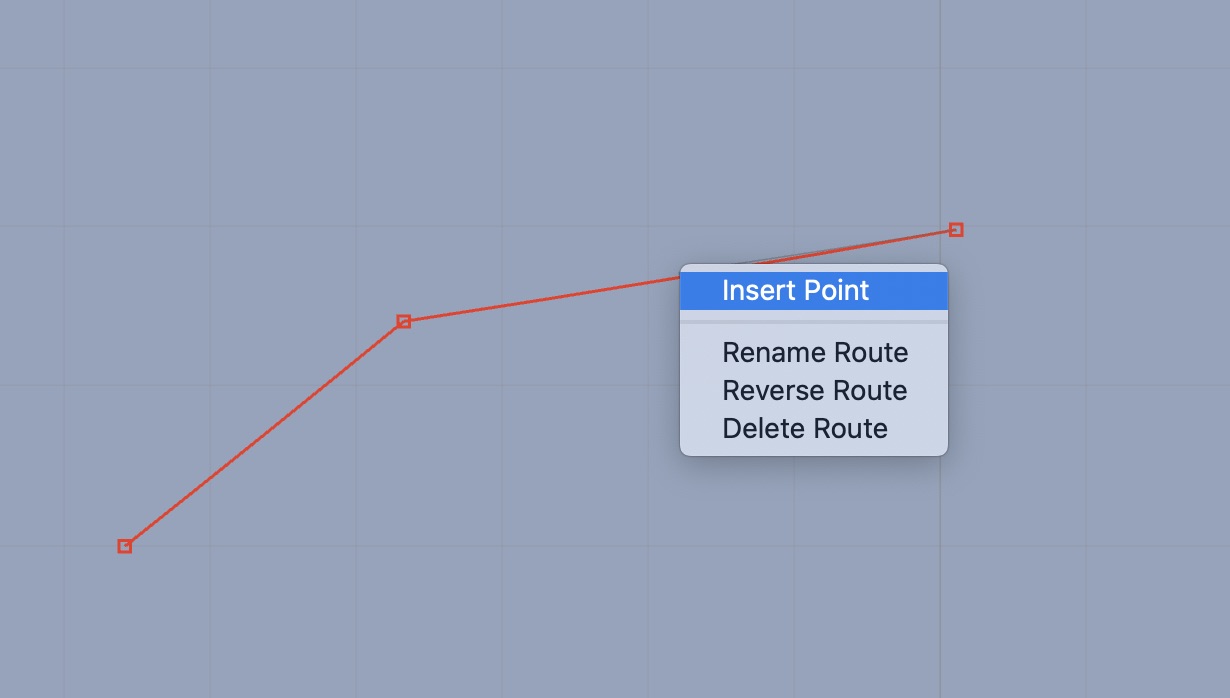
A route point can also be edited and deleted in the tool via a menu which is available. As in the remainder of the system, the way you bring up the menu for an object, is through one of the following techniques:
- double click on the point.
- hold down the control key as you click on the point.
- perform the right button click gesture, by performing a two finger press using the trackpad, on the point.
When you bring up the menu for a route point, the menu you see will be:
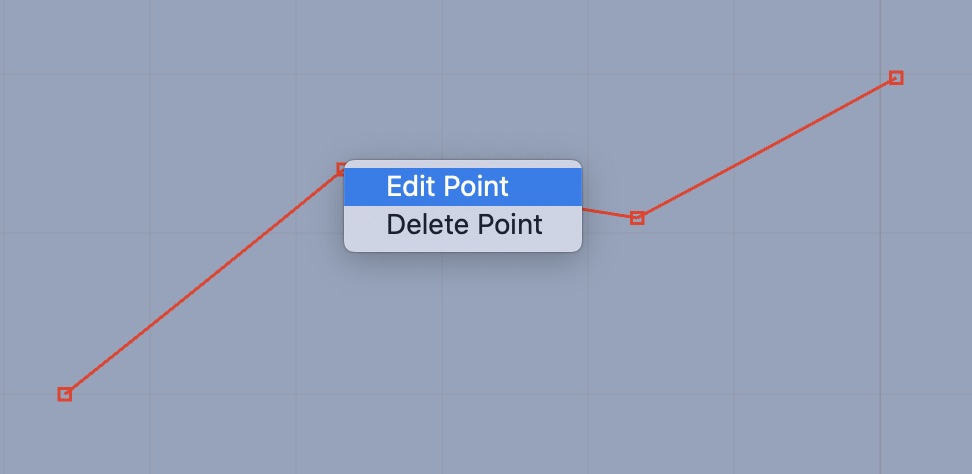
There are several properties which can be specified for a route point. Select Edit Point from the menu to see them:
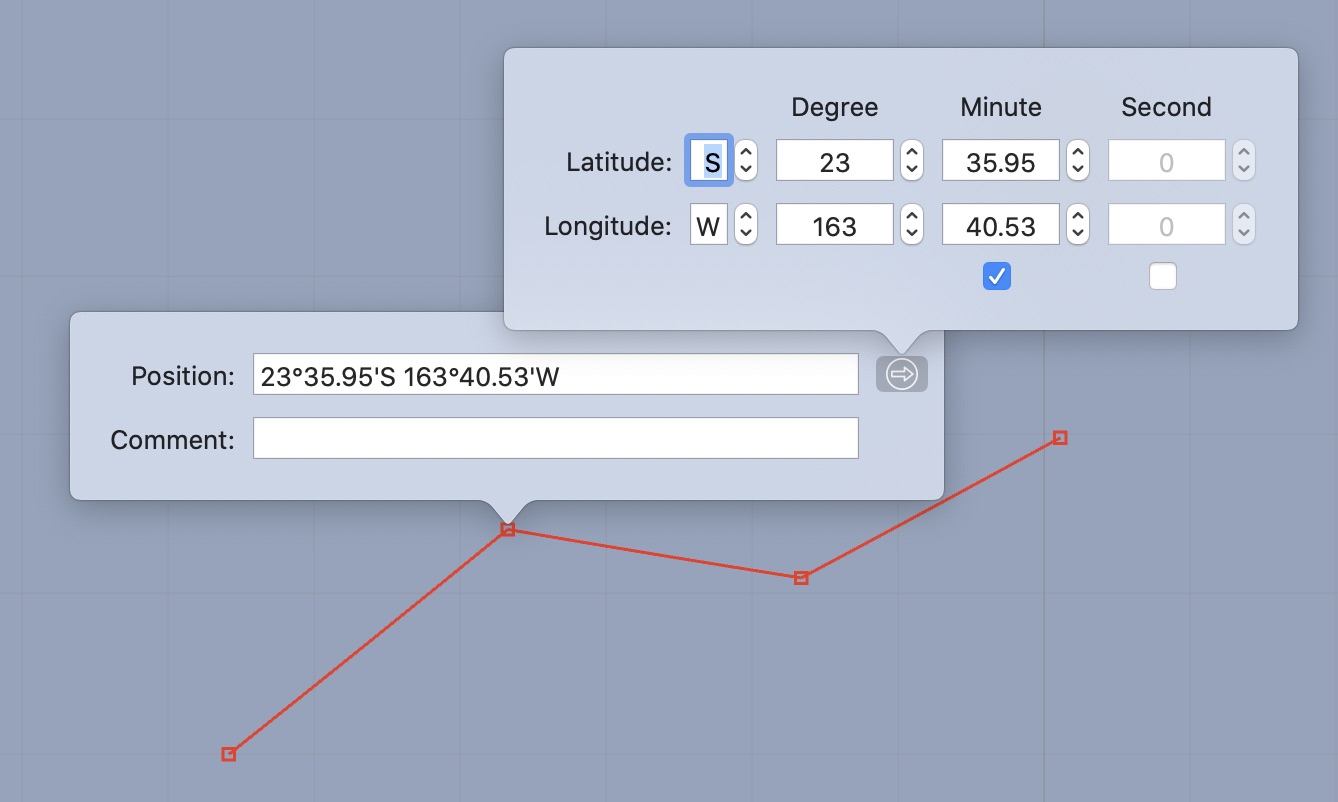
This editor allows you to:
- edit the points location by providing a new value.
- provide a comment for a point. Comments are not drawn.
If you want to alter a route points location, you can type a new value into the editor, shown above, or click on the reveal button to the right of the location which will show a secondary editor, allowing you to edit the position in a different manner.
Route selection.
You can create as many routes as you want. If you want to add new points to an existing route, you must first select it. This is done by clicking on the route. Selected routes are drawn in a different color than routes which are not selected.
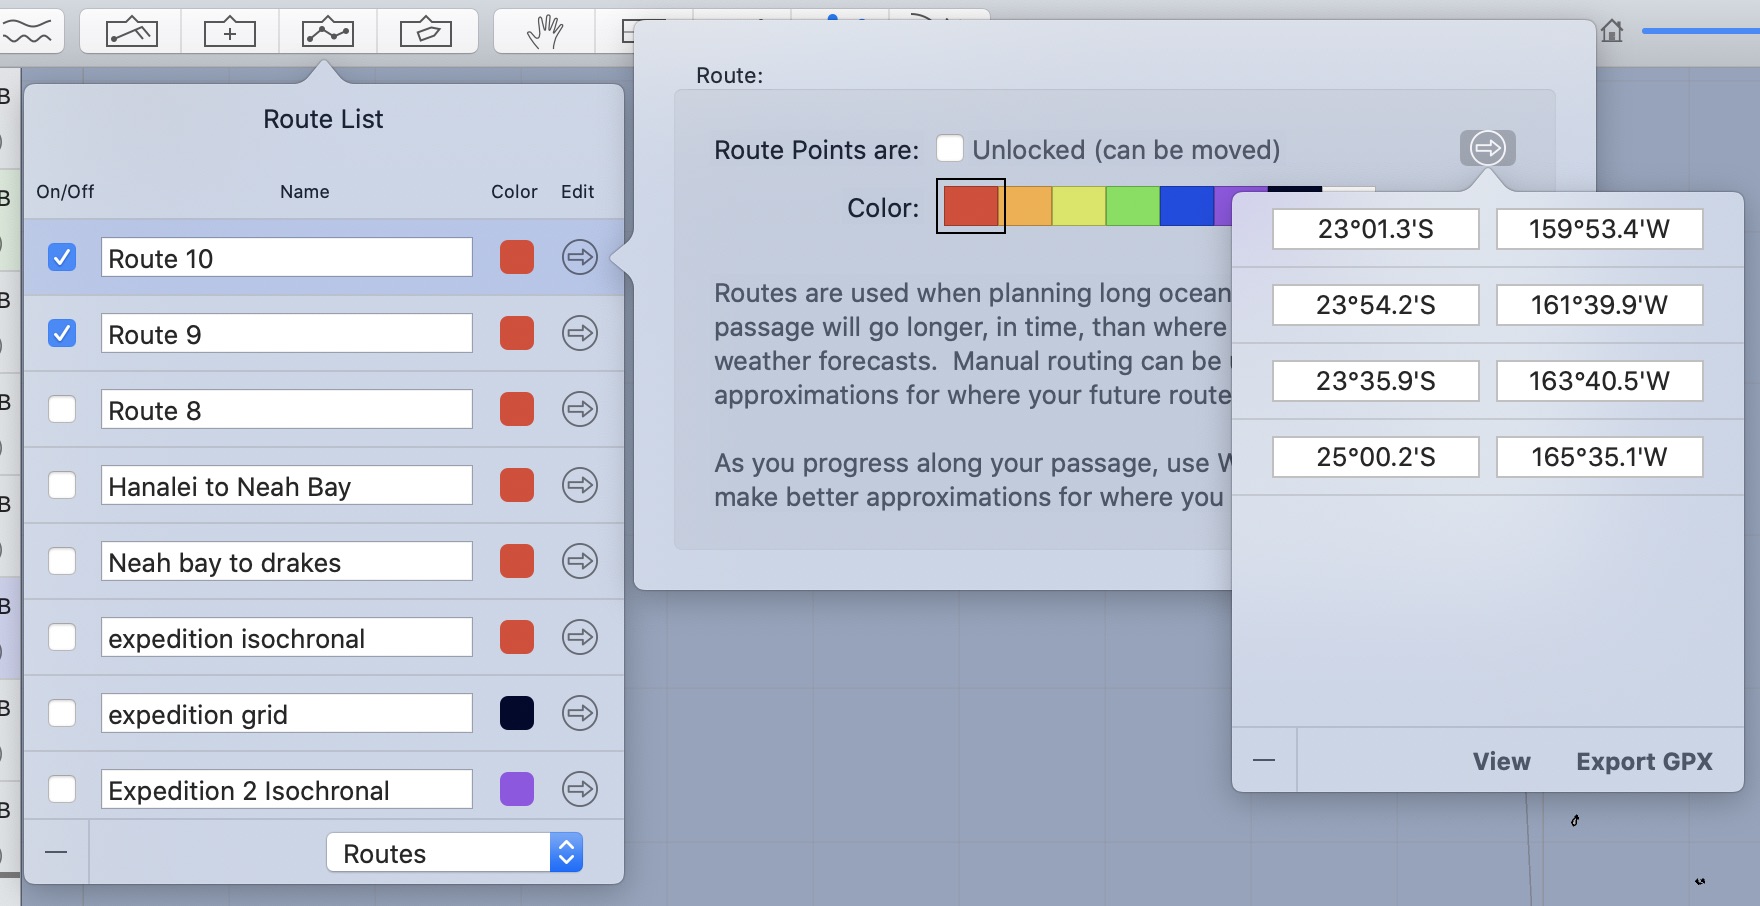
Routes list.
There is a route list editor available, which allows you to manage the routes in the system in a variety of ways.
- change a routes visibility.
- change a routes name.
- alter other route properties.