The weather routing solver is started by clicking on the Solve button:
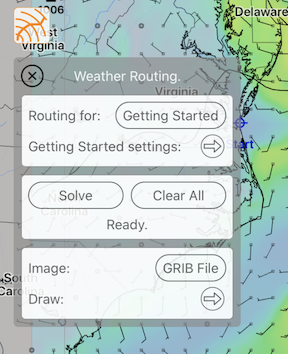
Each time you modify any of the inputs to the weather routing system and are ready to see the new results, click the Solve button. When you do this, the system will clear any previous solutions for the selected vessel and create a new set of solutions.
The Clear All button will remove all of the weather routing solutions in the system. As the system is able to work with multiple vessels, the clear all button will remove the solutions for all vessels which have associated weather route output.
If you want to compare the output for two or more vessels:
- select the first vessel in the configuration area
- provide the starting conditions for that vessel
- click on Solve to generate vessels weather routing solutions
- return to step 1, selecting the vessel you want to compare with, and solve for it as well
- repeat as many times as you wish
You may want to compare different vessels in several different situations. For example:
you are tracking another boat and want to compare their future positions against your own
you have created a variation of your own boat, with different configuration settings, and want to see how the settings affect the generated solutions
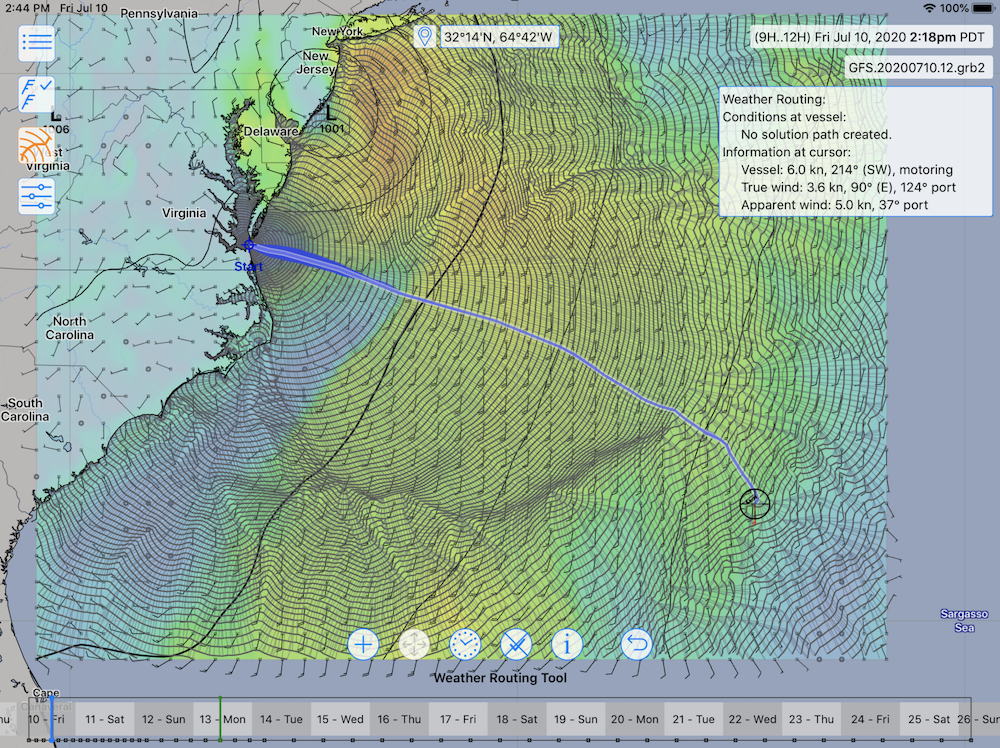
Your first weather routing solution.
If you are following along in this Getting Started guide, depending on your vessels performance, starting point and weather file, you will see something like this:

There are several things to notice in this image.
once you have generated the weather routing solutions, you can close the pane in order to create more space to view the results. Open the pane again when you need to re-solve or change any of the settings.
as you move the cursor around the image, there is a solution path shown. This dynamic path is the optimized path from the start position to the cursor.
as you move the cursor around, there is information shown in the text box on the right describing the path in several ways (duration, conditions, etc.)
The next step in this guide is to have you select the ending point for the solver.
Moving the cursor around
The easiest way to move the cursor around is to scroll the map. As the cursor is centered in the view, as the map scrolls, so does the cursor, allowing you can explore the weather routing solution space.
Alternatively, if you prefer to leave the screen stationary, you can tap on the map and hold. After a brief delay, the cursor will snap to your fingers location and will then follow it as you move around. When you raise your finger, the tap is released and the cursor will snap back to the center.
Here is an example where the cursor is offset, due to this tap-hold-move gesture:
(Note that this tap-hold-move gesture is available at any point in the app. It can be used to explore GRIB files, or when a meteogram is being shown, to explore the meteogram at different locations.)
Showing and hiding information
The system is able to present you with a lot of information describing the weather data and the Weather Routing solution. There are times when you want to concentrate on the display, and other times when you want to read the numbers and dive into the finer details. You have control over what information to hide and show.
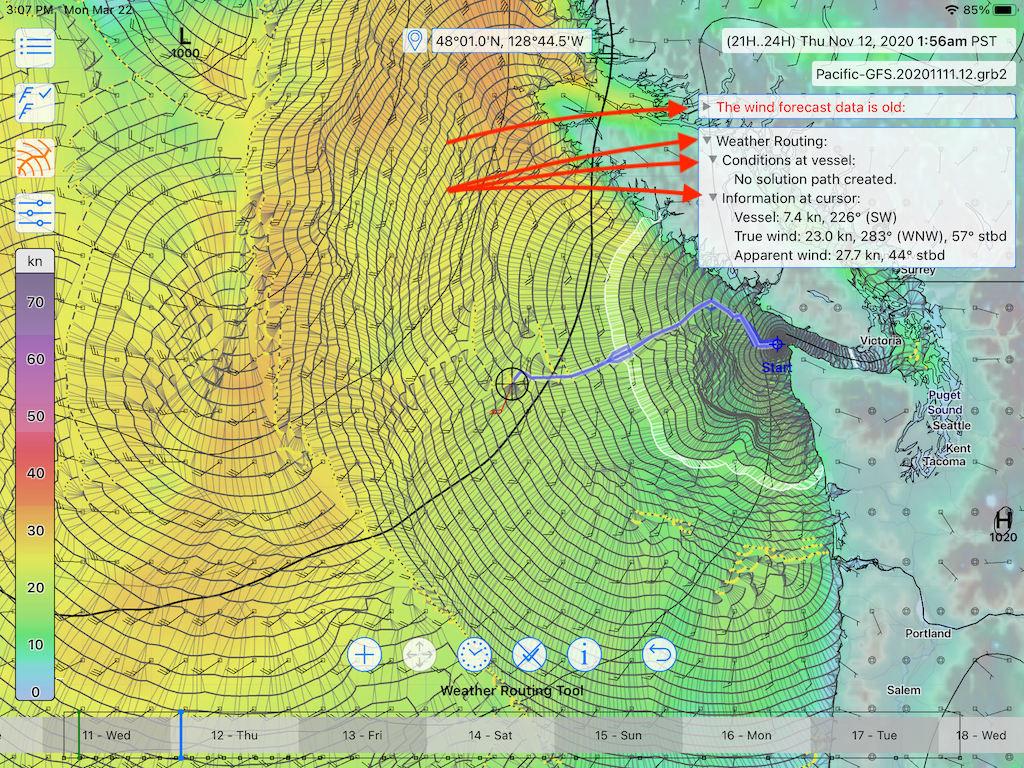
The two top right information text views contain little hide / show buttons in the shape of a little triangle, which points down or to the right. If you tap on these arrows, the group of information they control will be hidden or shown.
Note that while the arrows appear to be quite small, they have larger borders which you do not see. Tapping on them will be easier than it would appear.