After providing the performance information for the vessel, you will note that the system is now guiding you again, informing you that there is missing starting information:
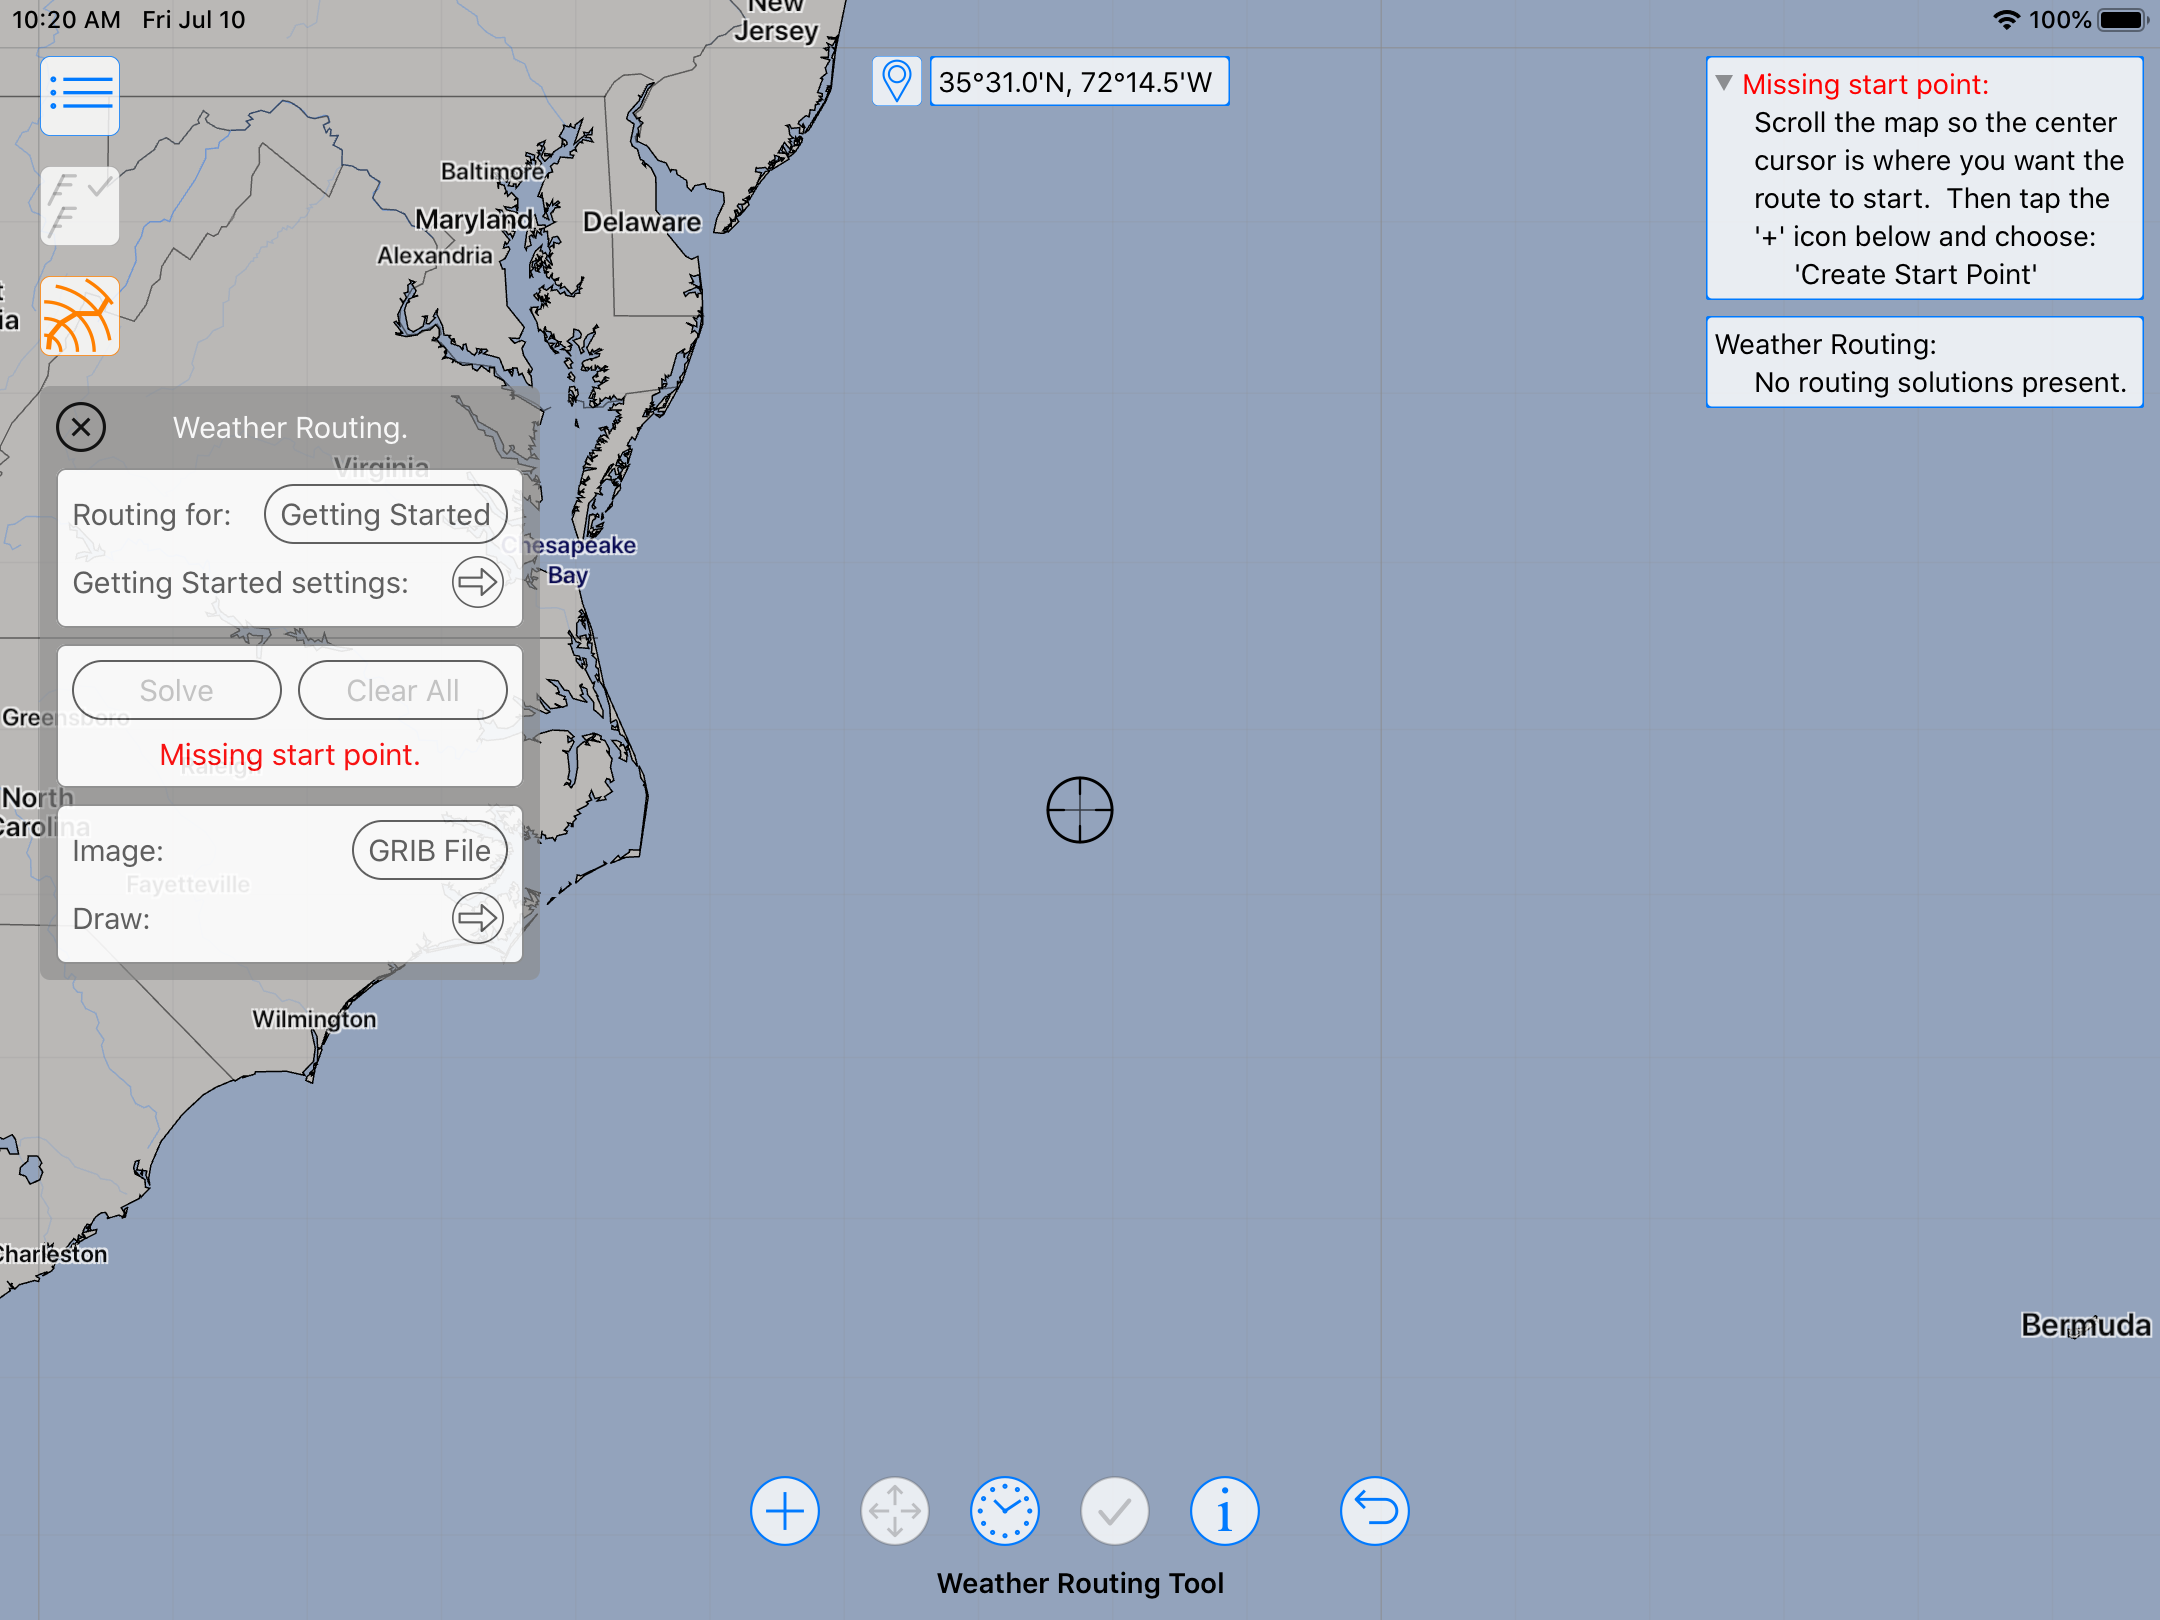
One of the essential pieces of information for the weather router is, of course, the start position and time for the route you are planning.
Creating a start point.
Note that the system is prompting you with directions, in the top right corner of the screen. These hints appear from time to time when the system detects a problem.
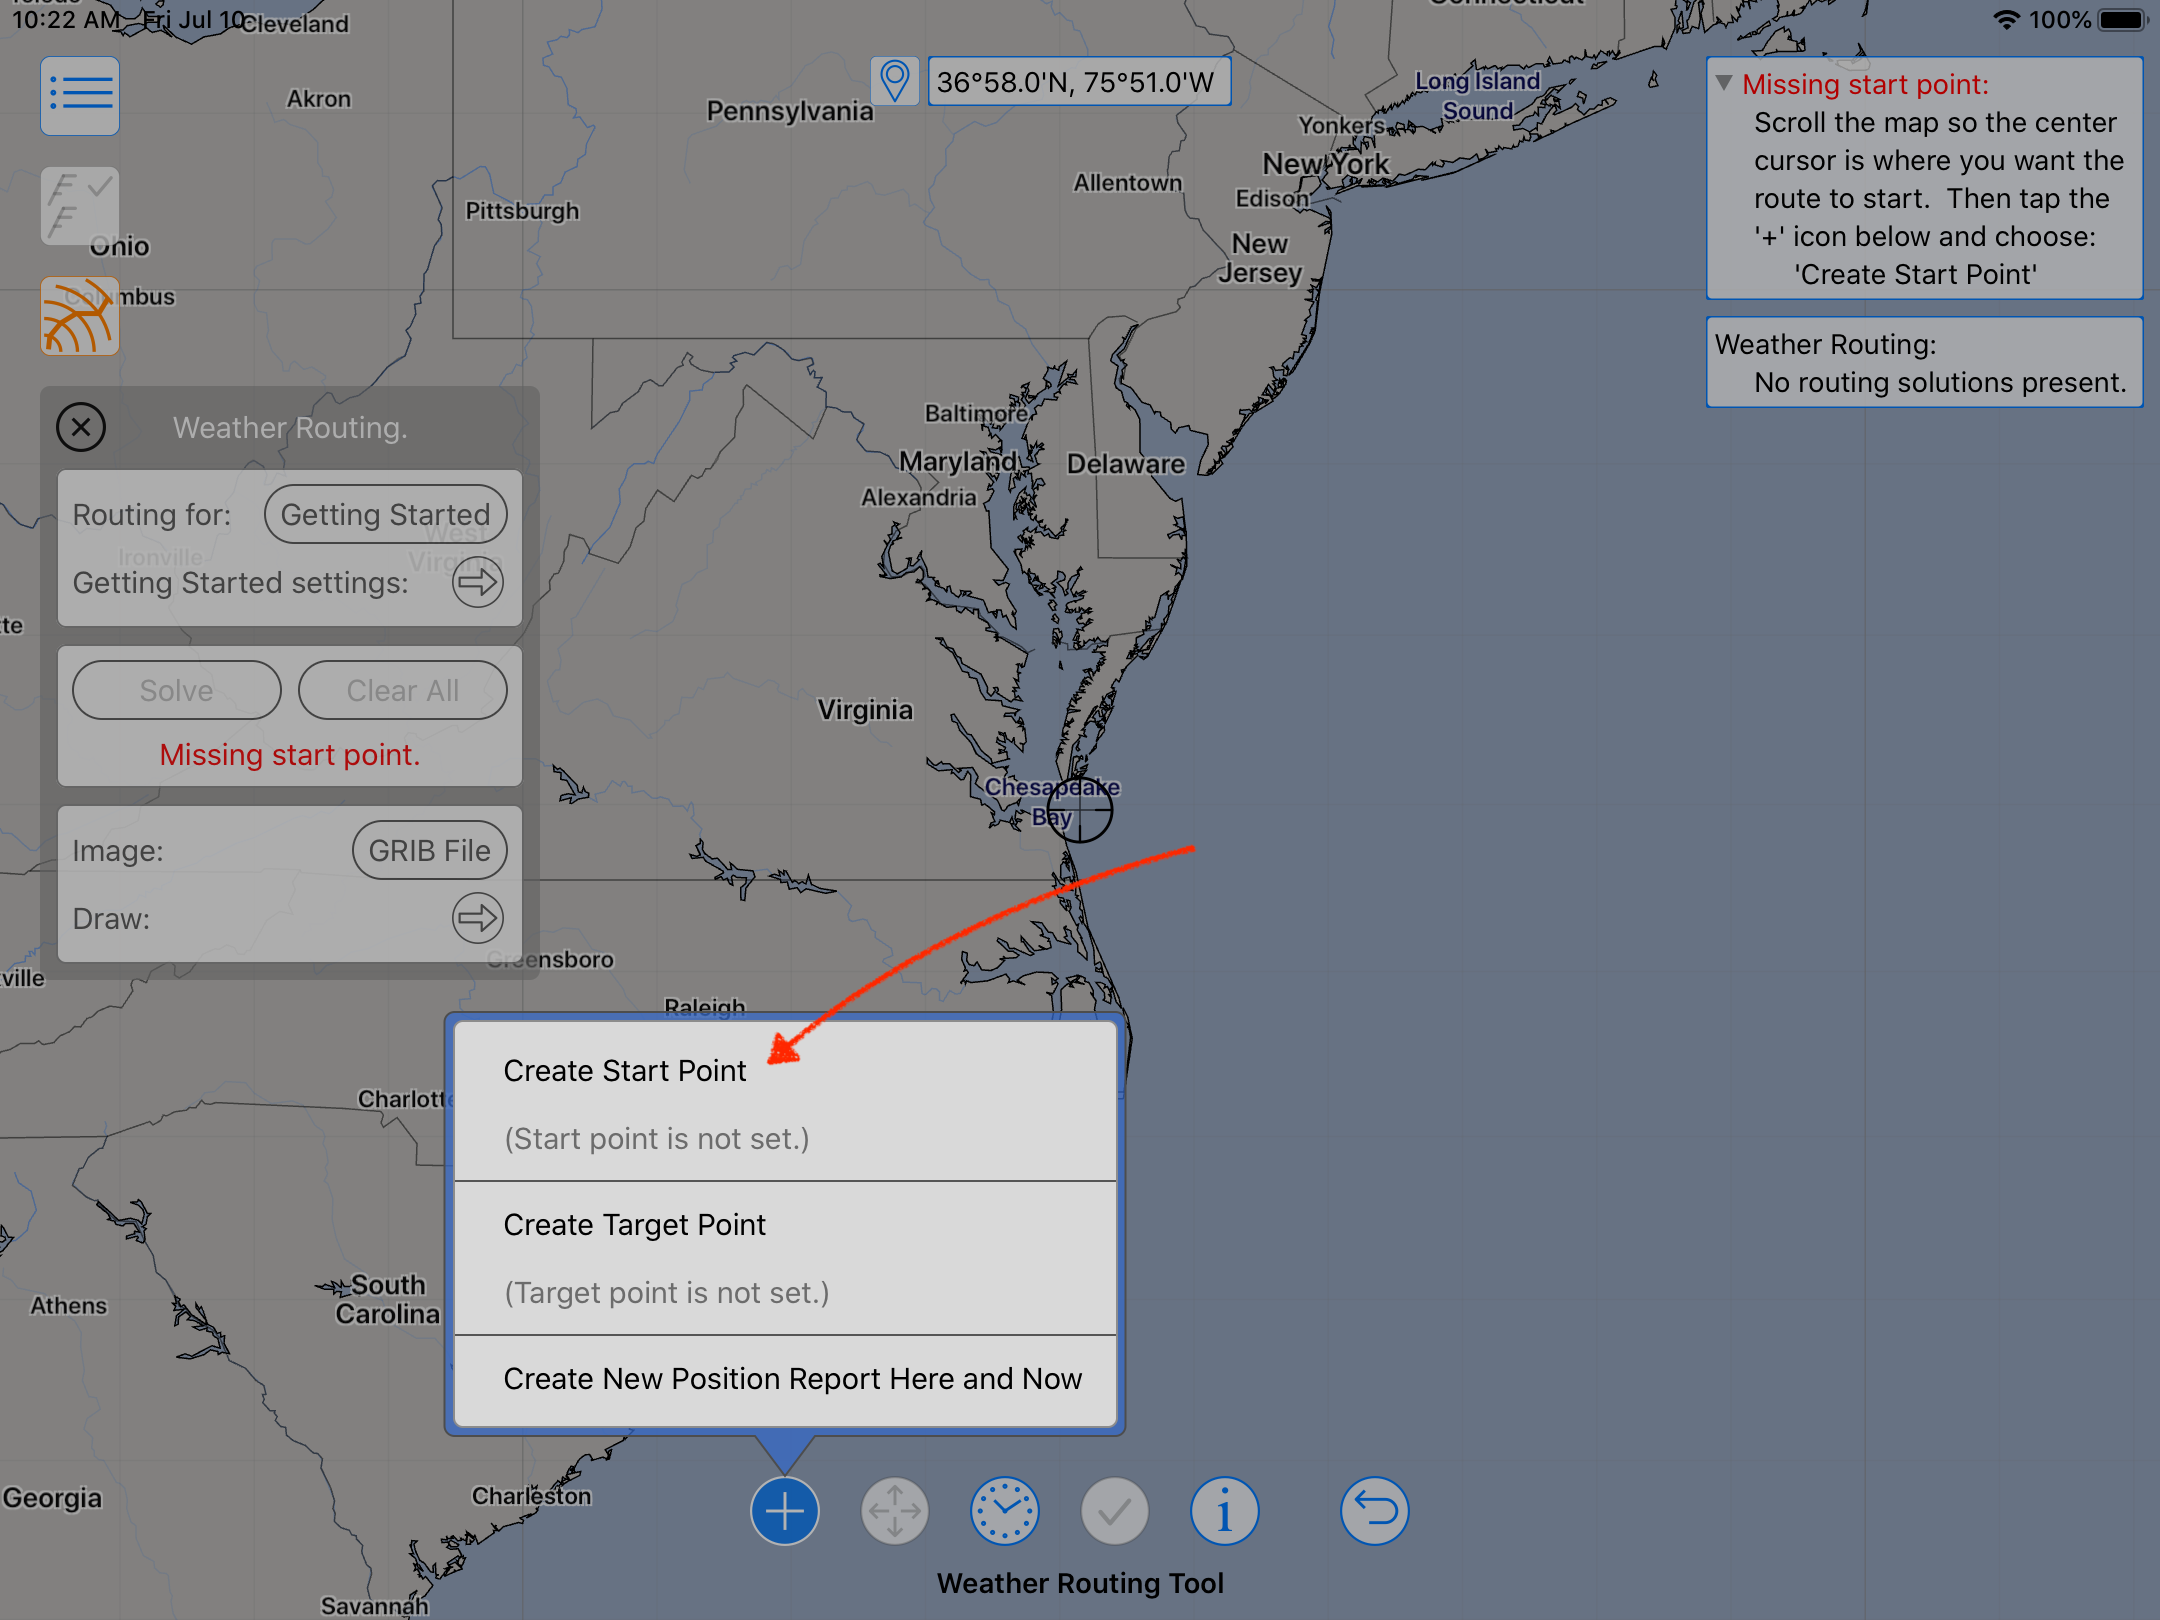
The easiest way to specify the starting point is to scroll the map over to the point you want, tap on the + (points) button and select Create Start Point from the menu:
If you want to start the route at your current vessel position, and your device has a built in GPS, you can tap the location button to the left of the latitude / longitude information showing in the window. This will cause the map to scroll over to your current location and you can then create, or move, the start point there.
If your device does not have a built in GPS, but you know your location from some other onboard GPS, you can enter the latitude / longitude manually, by tapping on the latitude / longitude information text shown, and then entering the new location:
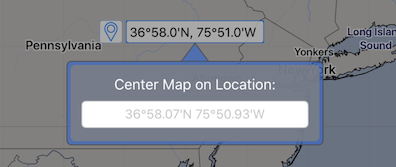
Note that you can simply type in the latitude, longitude, no need for the symbols or the N / S / E / W signifiers, if you are in the same region of the world as is shown on the map. One example of typical input would be:
36 55 75 46
Signifying 36 degrees, 55 minutes of latitude, 75 degrees, 46 minutes of longitude, and the N / S / E / W indicators set according to the current view.
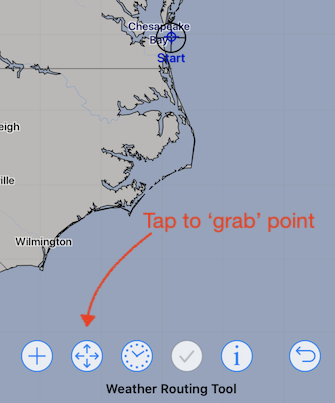
Moving the start point.
After a start point has been created, when you want to move it, you have several ways of doing that.
You can scroll the map to the new location, tap the + (points) button and then choose Move Start Point Here from the menu.
Alternatively, you can position the cursor over the point (start point or target point,) grab it, scroll the map to a new location and then release it there:

Setting the start time.
In order to set the start time, you need to have the GRIB file selected that you want to use with weather routing. With the GRIB file selected, adjust the GRIB timeline to the start time you want.
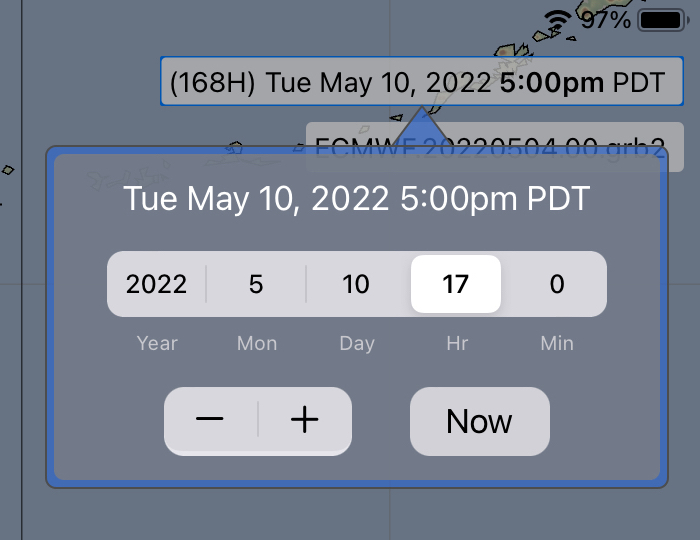
If you have a particular GRIB time you want to start at, you can use the GRIB time editor, which is shown by tapping on the GRIB time text:
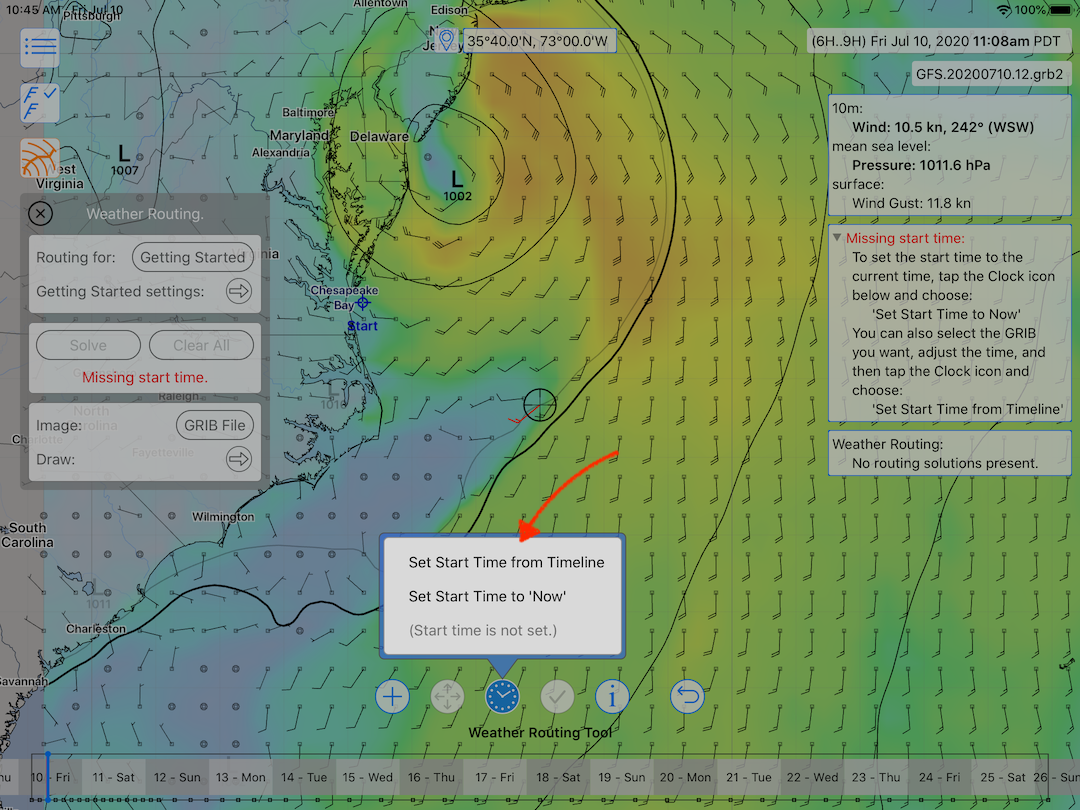
Once you have the GRIB time set to the start time you want, bring up the tool menu, as shown below, and select the item: Set Start Time from Timeline
Ready!
After setting the starting time you will notice that the system is now ready to run its first weather routing solution.