After creating the vessel to be used in this guide, tap on the Weather Routing tool button. If the WR pane isn’t open, tap on the WR pane button.
The first button in the pane allows you to choose which vessel you want the solver to work with. Tap on the Routing for button and select the vessel you want to work with.

You will now see something like this:
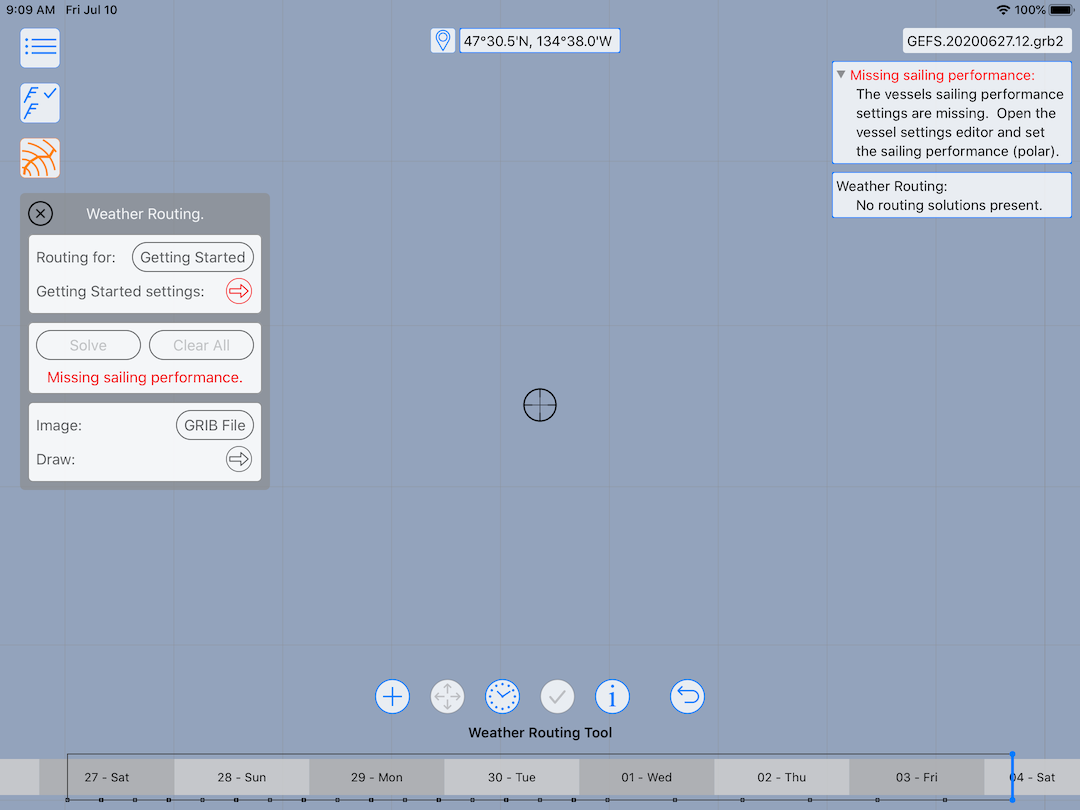
All of the text in red is warning you that there are missing details. These missing details are required before you can start producing your first weather routes.
Before moving onto the next topic, which is where all of this missing information will be provided, explore the tool icons a little. Each of the buttons in the lower portion of the screen controls some aspect of the weather routing system.
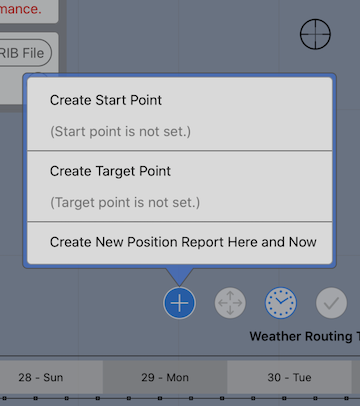
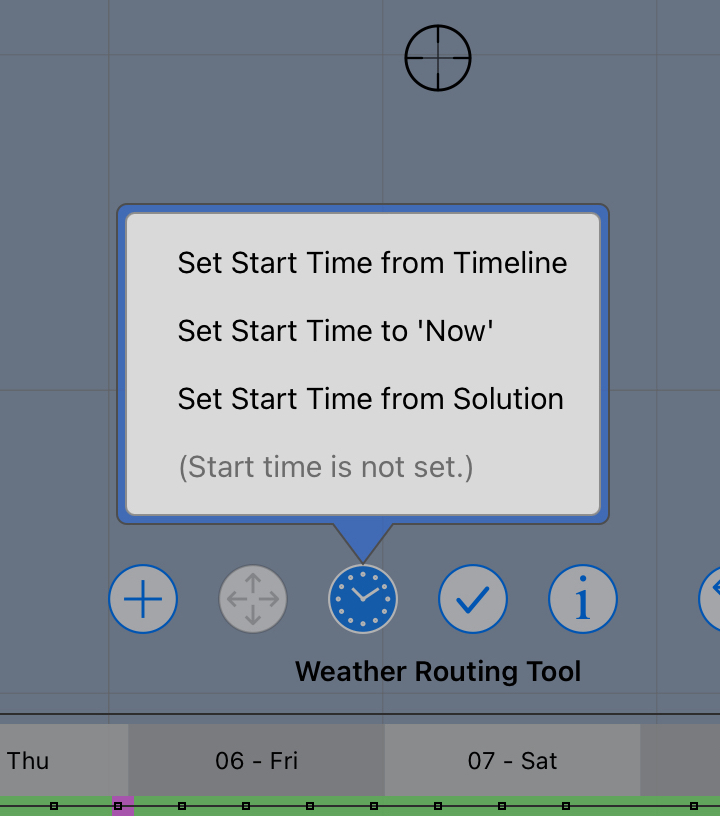

In addition to those three buttons, there is also a button which allows you to move the start or target point, a selection and slide time button, along with an undo button. These will be described in more detail later.