The full solution space shown on the previous page can be useful for exploring the wide range of paths that are available. However, generally we have a position we are heading toward, and providing this to the solver allows it to generate the optimized path for you.
When the solver generates an optimized path, additional tools in the system are available to help you evaluate it.
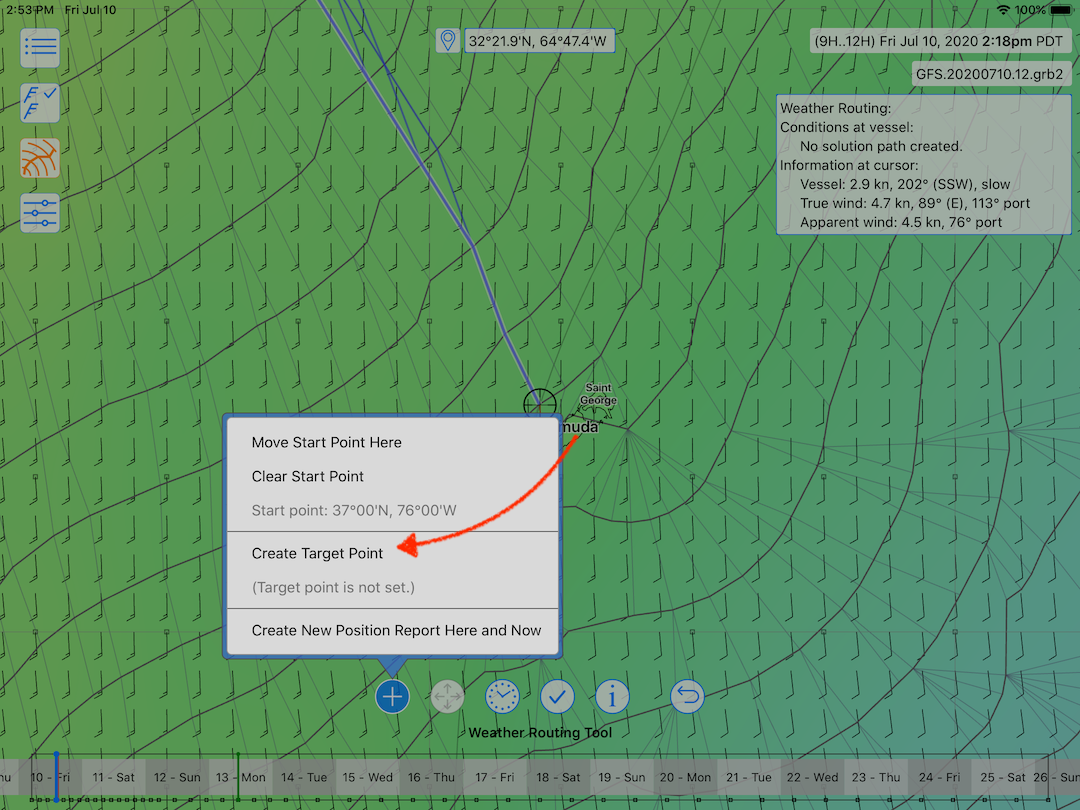
This example is for a path starting in the Chesapeake Bay and heading toward Bermuda. Zoom and scroll the map into Bermuda, then tap on the + (points) button and then tap on Create Target Point.
As with the start point, you can drag the target point around by positioning the cursor over it, tapping the move point button, dragging it somewhere and then releasing it.
After providing a target point, have the system solve again (tap on the Solve button.)
You may see something like this:
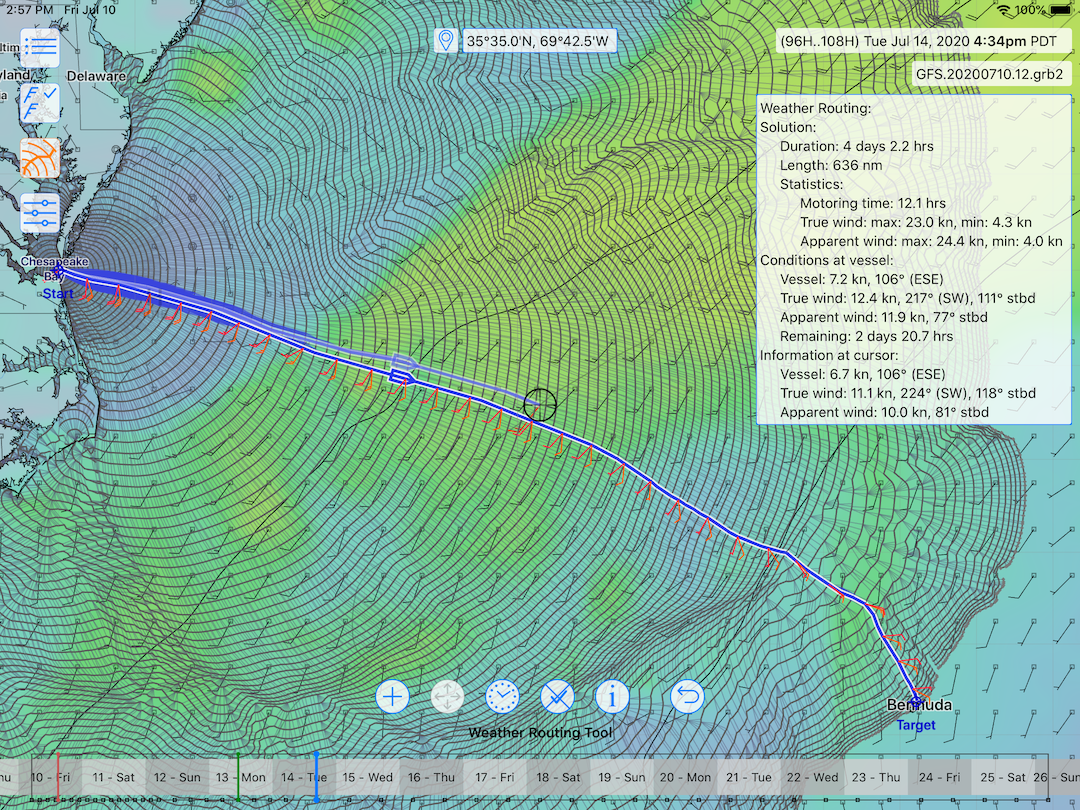
Again, there are several new things to notice:
the optimized path generated is the path shown that has a white outline.
there is now more information being shown in the text box on the right. The generated path is described in several key ways.
in this example, there are areas where the optimized path is showing close alternatives. These alternative paths are showing where the path is less sensitive and you have options available which arrive at close to the time of the optimized path. (There is more detail on this in the user manual.)
wind barbs are being shown. These represent the wind conditions encountered by the boat at the indicated time along the path. There are two wind barbs shown, one for the true wind and one for apparent. As you would expect, the apparent wind is shown with the wind barb closer to the bow of the boat.